1. To create your DSM application, access the menu DevOps Secret Manager ➔ Applications ➔ Applications, in the action menu click “New”:
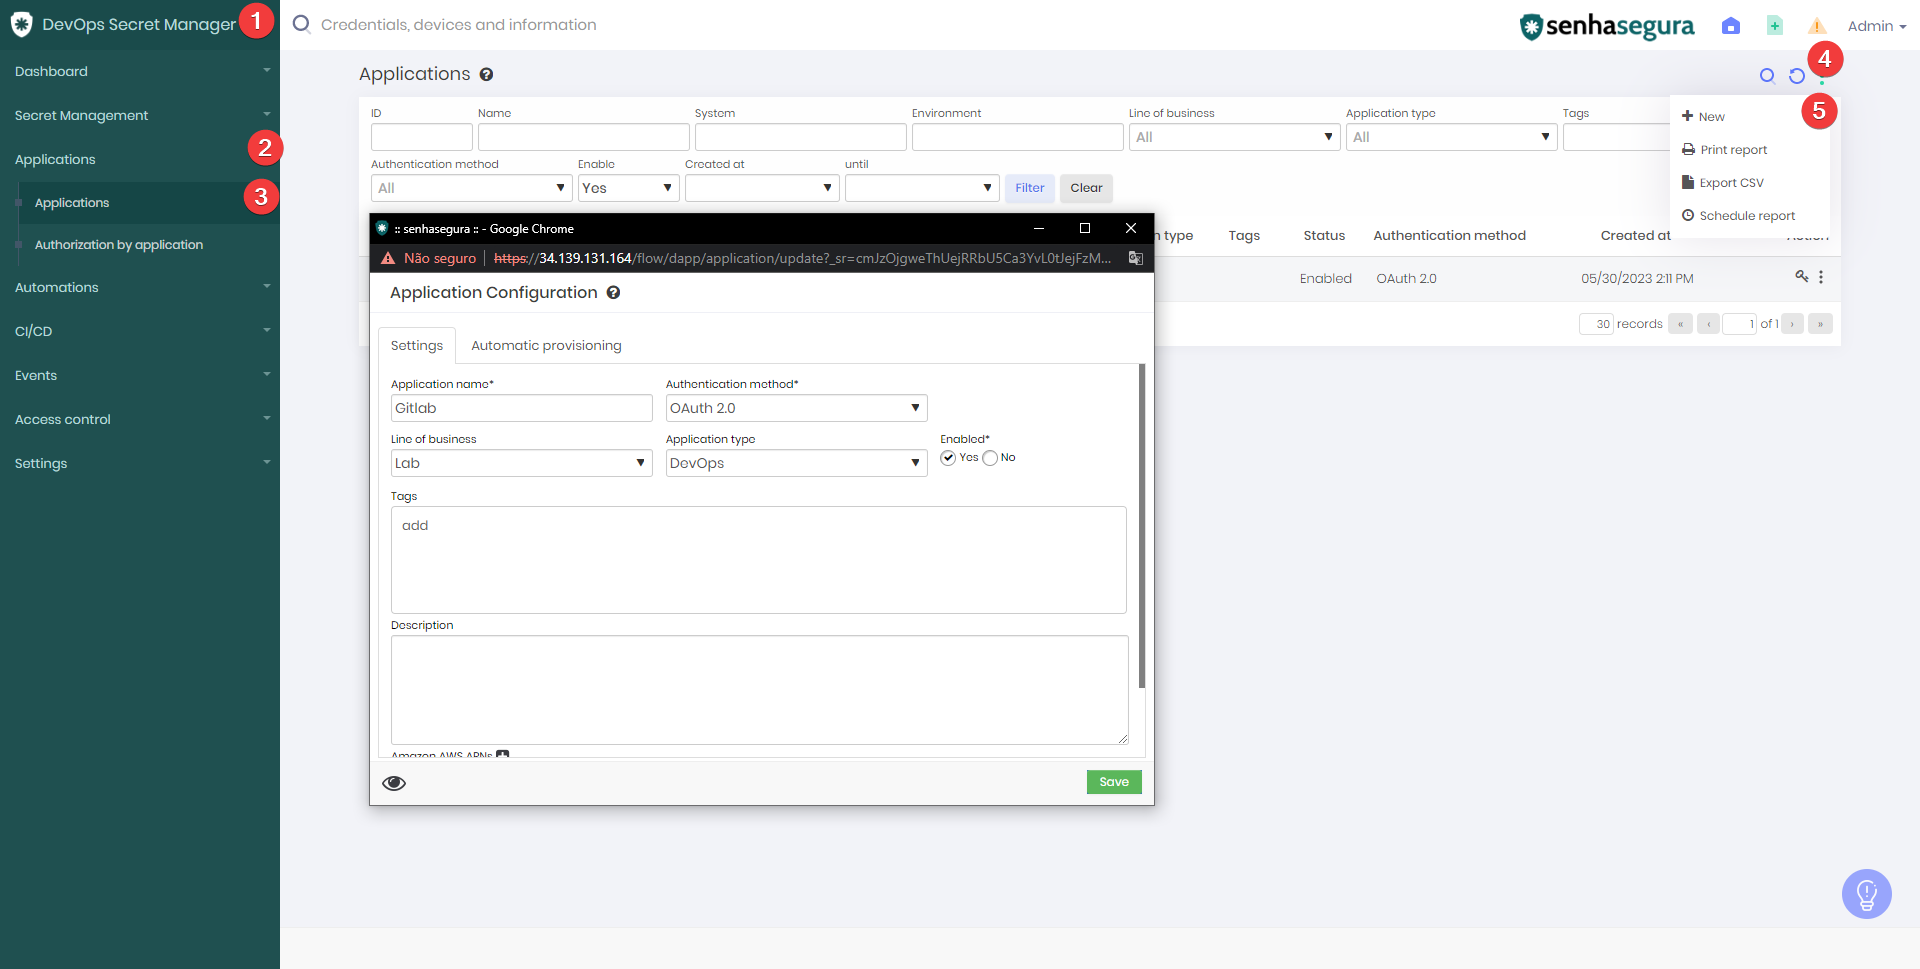
If the application does not appear for your user, confirm that there is a DSM access group configured correctly.
2. After creating the application, create your authorization and link your secret to it.

3. It is necessary to create execution variables in CI/CD. Access your CI/CD variables and create data referring to the application name, system and environment registered in the application authorization in senhasegura. Access the menu Settings ➔ CI/CD ➔ Variables ➔ Expand
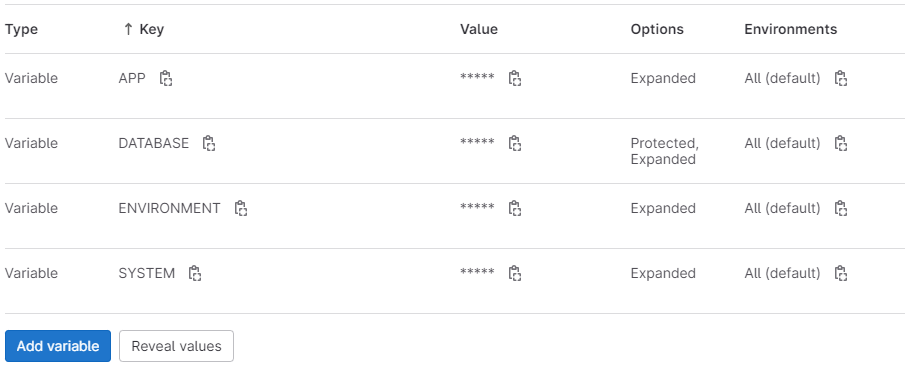
This information will be used to run the plugin.
4. Import the plug-in and necessary files to your project. Access the root of your GitLab repository and transfer the files “runb”, “senhasegura-mapping.json” and ”.gitlab-ci.yml”.
Contact the senhasegura support team to obtain the files runb and senhasegura-mapping.
-
runb: plugin for integrating senhasegura with GitLab
-
senhasegura-mapping.json: file responsible for mapping existing variables in the pipeline for injection to a senhasegura secret
-
.gitlab-ci.yml: file responsible for running your pipeline
An example of the use of .gitlab-ci.yml:
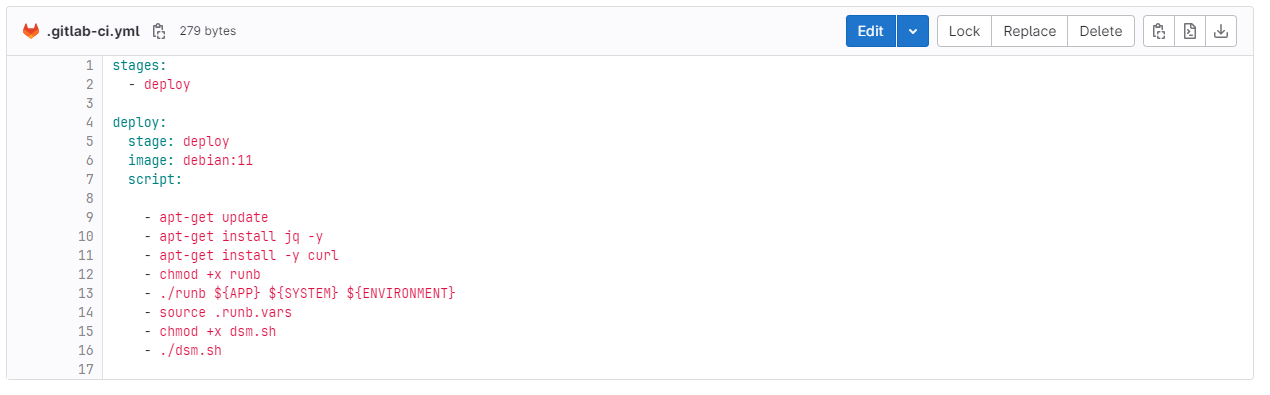
Notice that we used a debian 11 to execute the script present between lines 9 and 16.
![]() WARNING
WARNING
The senhasegura plugin depends on the curl and jq binary, the installation was performed on lines 10 and 11.
-
Line 13: The execution of the runb plug-in is initiated, utilizing the variables that were established in step 3.
-
Line 14: The exportation of the variables, which are contained within the senhasegura secrets, to the operating system is performed. This enables other applications within the same pipeline to access and utilize these variables.
-
Line 16: In order to provide a better exemplification, a concise script is devised, enabling the issuance of API requests to the senhasegura platform. This script leverages the value of a secret that is securely stored within the senhasegura system. The implementation of Step 14 facilitates this functionality.
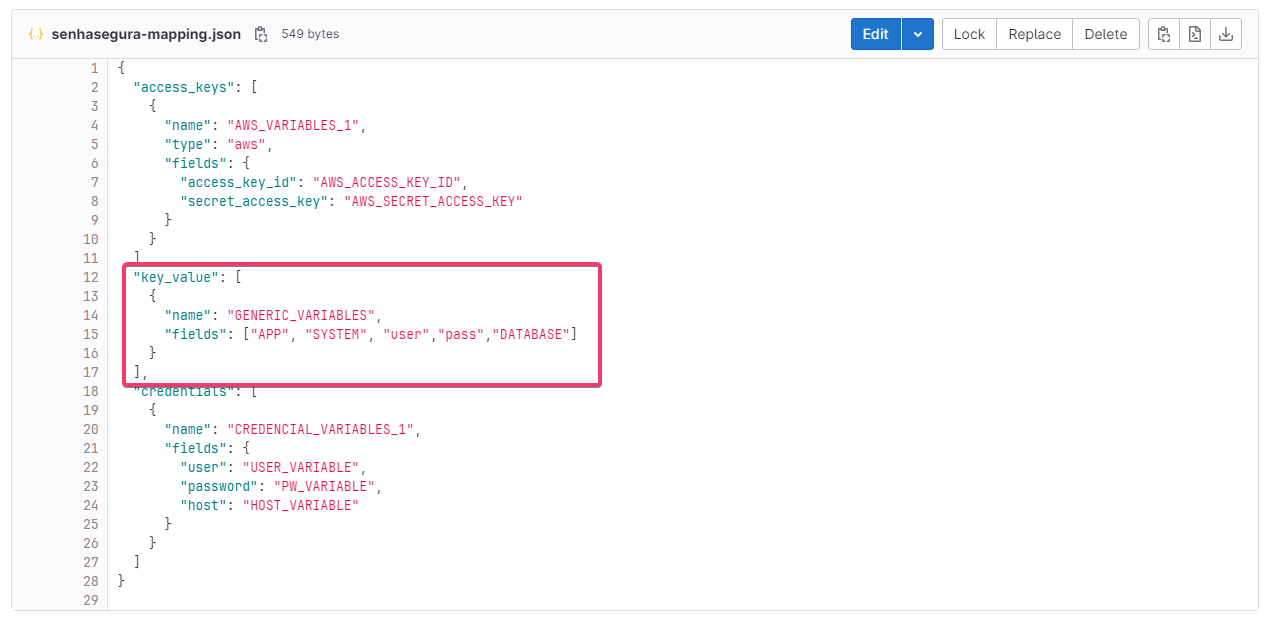
5. Configure the variable mapping. The senhasegura-mapping file will have a very important file in the execution of the rub plug-in. In general, all the variables present in the execution of the pipeline are inserted in senhasegura, access the menu DevOps Secret Manager → CI/CD → Variables.
If there is a variable or credential that needs to be inserted in the secrets corresponding to the authorization, this variable must be inserted in the senhasegura-mapping, according to the example below, where we want variables such as “user,pass,DATABASE” to be added to secret .
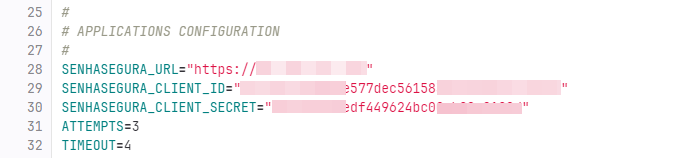
6. Insert your authorizations to the runb script. Edit the runb and enter the API authorizations created in step 2, as in the example below:
Execution
After configuring the integration following the steps above, we can run our pipeline.
1. Runb execution.
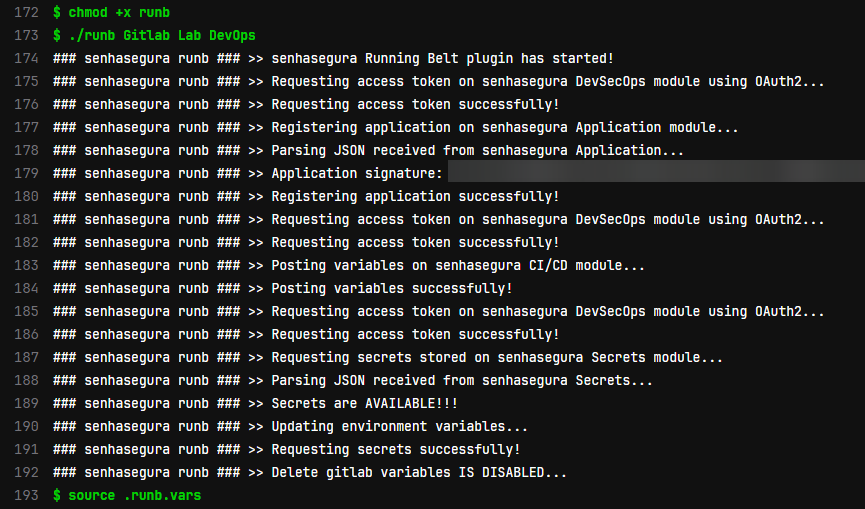
Note that, following what was defined in “.gitlab-ci.yml” the runb plug-in was executed successfully.
In this process, after the “source”, all the variables present in the senhasegura secrets will be available in the pipeline. Therefore, use this feature wisely and ensure that the variables are deleted from the OS (unset).
In our secrets, we have information as in the example below:
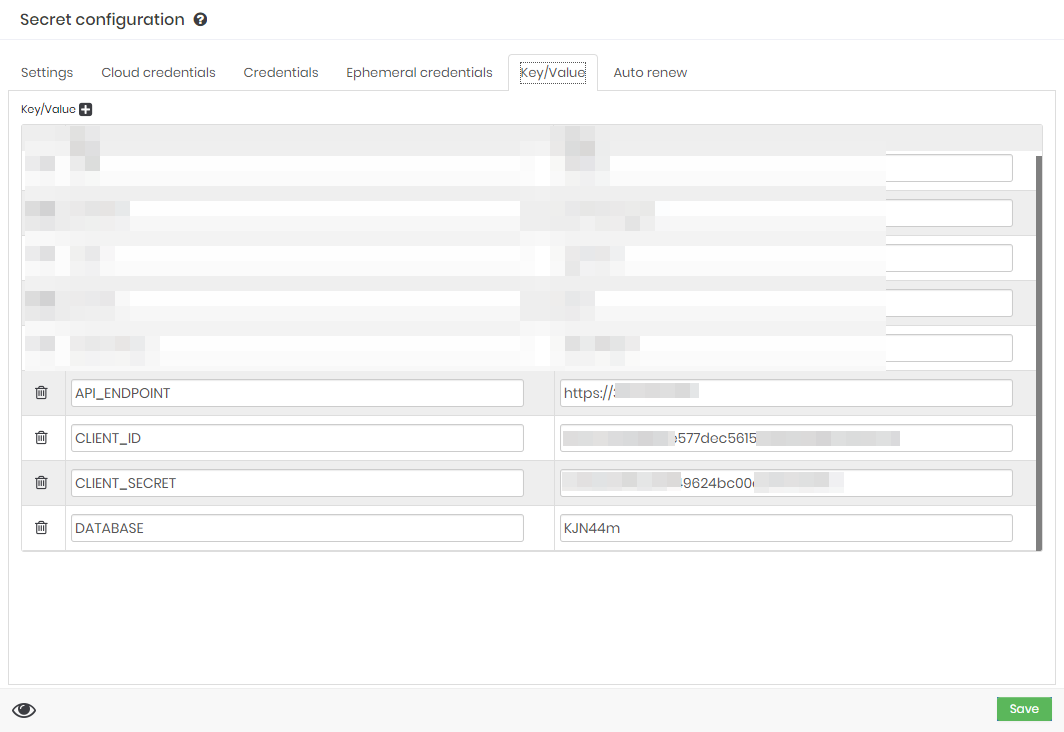
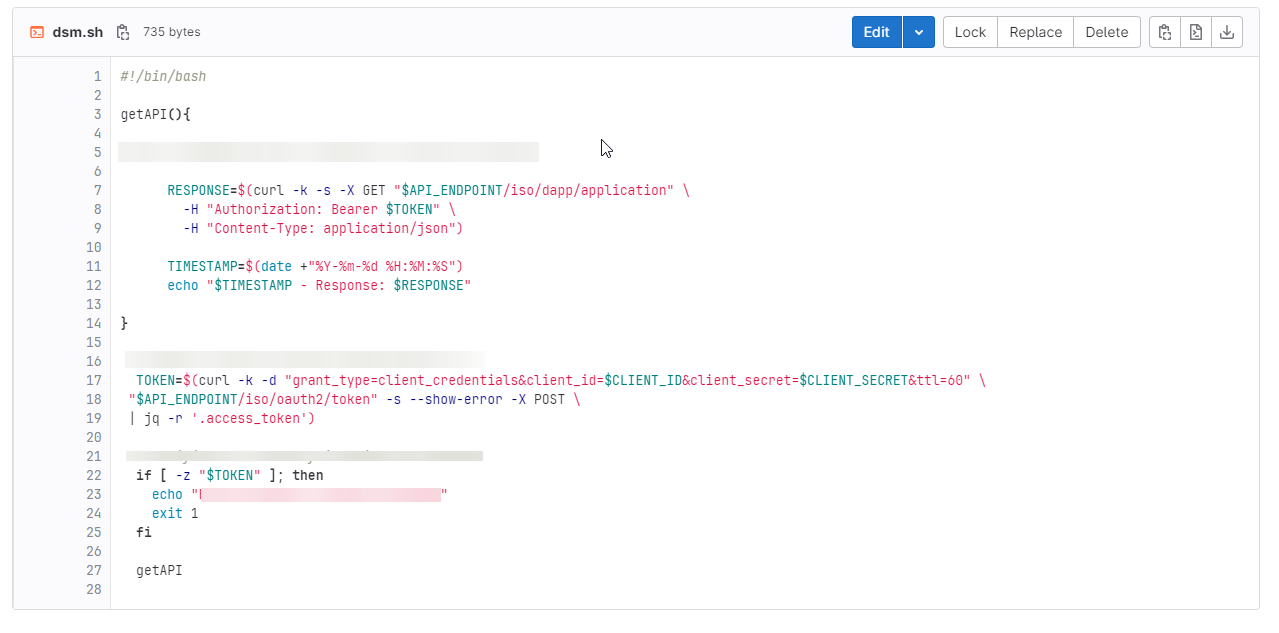
We have the “dsm.sh” script as part of our pipeline execution. This script needs to obtain the variables “API_ENDPOINT”, “CLIENT_ID” and “CLIENT_SECRET” that are present in a secret in senhasegura.
After executing the runb, these variables became available for use in the pipeline, allowing these values not to be fixed in the script, but rather injected during execution.