SMTP server configuration requires attention in registering device and credential information.
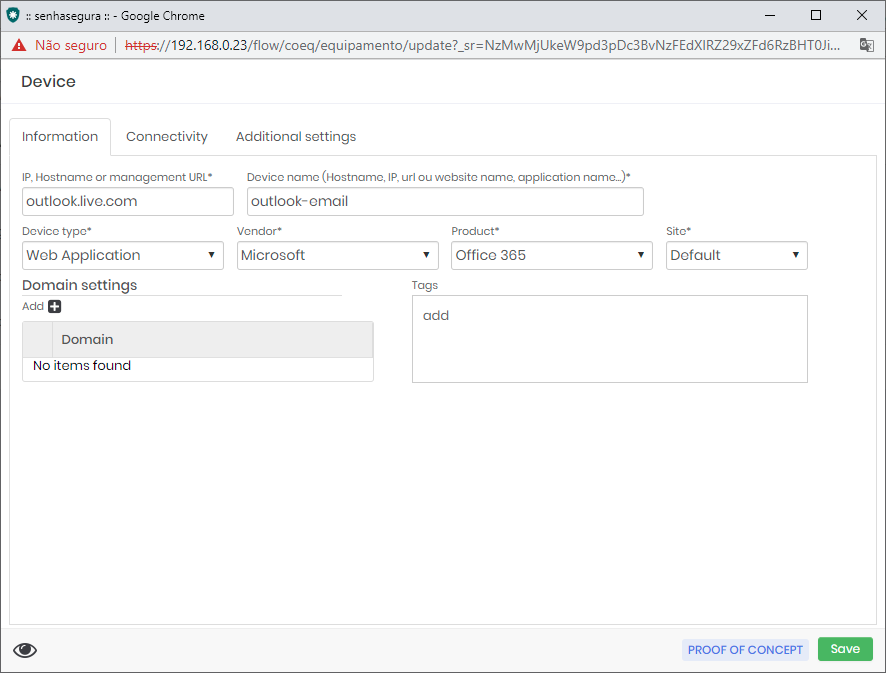
In the device configuration, fill in the following information:
- IP, Hostname or management URL: fill in the url of the email service used;
- Device name (Hostname, IP, url ou website name, application name…): fill in the device name;
- Device type: Web Application;
- Vendor: select the type of vendor;
- Product: select the type of product;
- Site: Default.
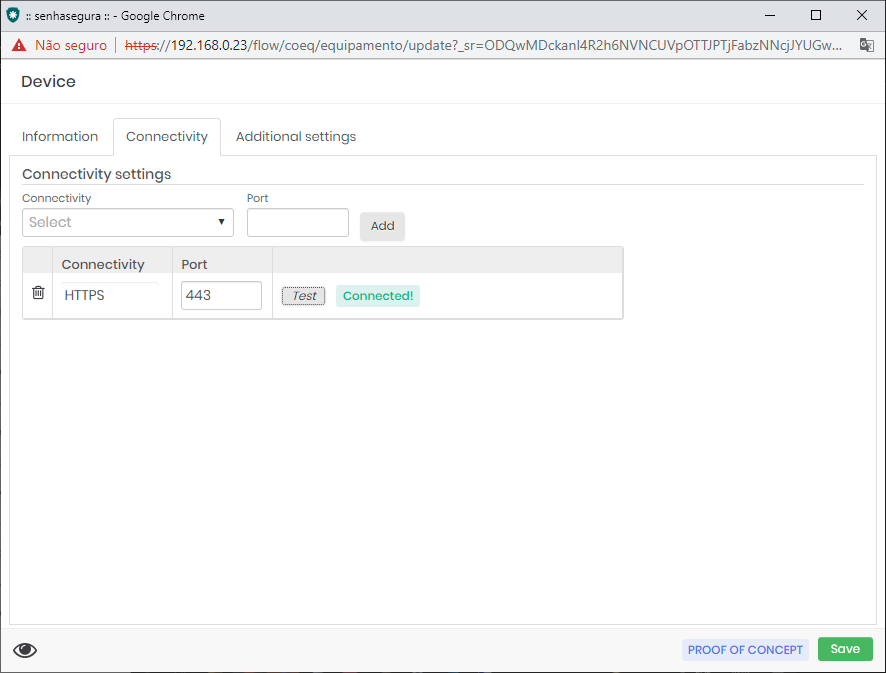
Add Https connectivity.
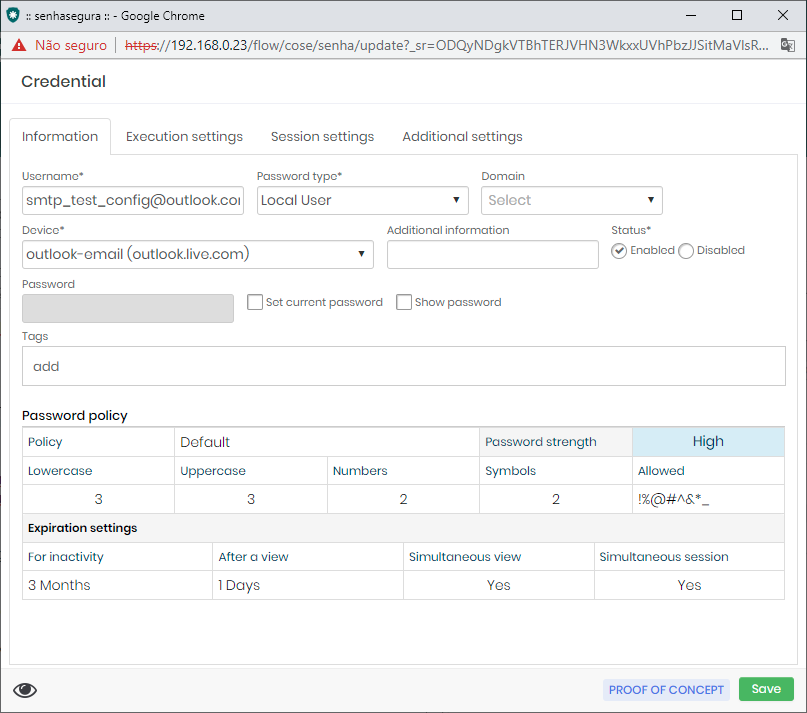
In the credential configuration, fill in the following information:
- Username: Fill in the email that will be used by the SMTP server;
- Password type: Local User;
- Device: Select the registered device;
- Password: Fill in the email password.
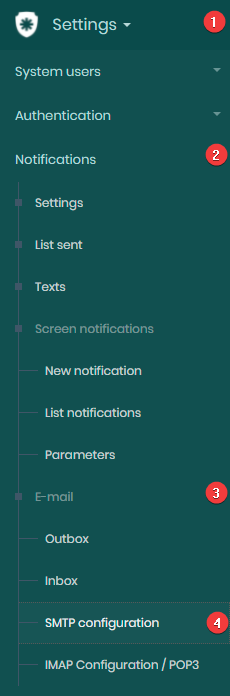
To configure the SMTP server go to Settings → Notifications → Email → SMTP configuration.
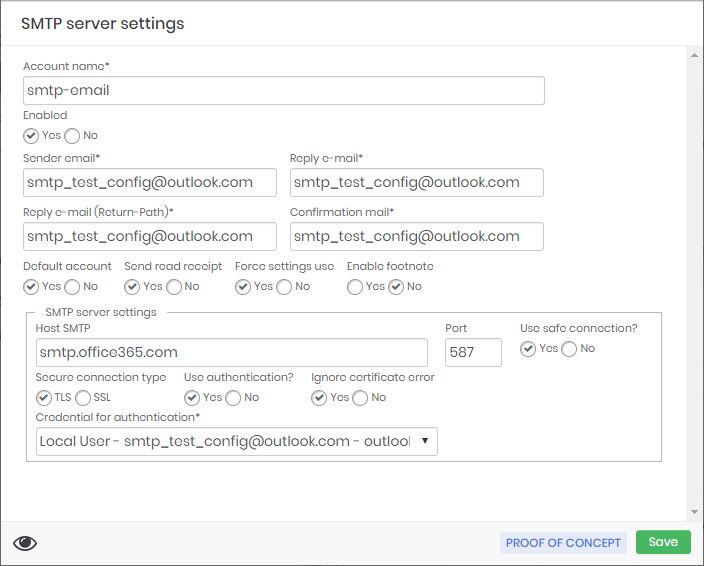
Click on the New icon for a new registration, and fill in the requested information:
- Account name: fill with account name;
- Enabled: Yes or No;
- Sender email: Fill in the sending email;
- Reply e-mail: Fill in the reply email;
- Reply e-mail (Return-Path): Fill in the reply email (Return-Path);
- Confirmation mail: Confirm email;
- Default account: Yes or No;
- Send read receipt: Yes or No;
- Force settings use: Yes or No;
- Enable footnote: Yes or No.
SMTP server settings
- Host SMTP: fill in the SMTP host of the registered credential;
- Port: select the port;
- Use safe connection?: Yes or No;
- Secure connection type: Yes or No;
- Use authentication?: Yes;
- Ignore certificate erro: Yes or No;
- Credential for authentication: select the registered credential to send the email.
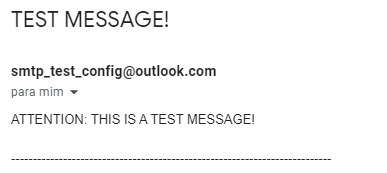
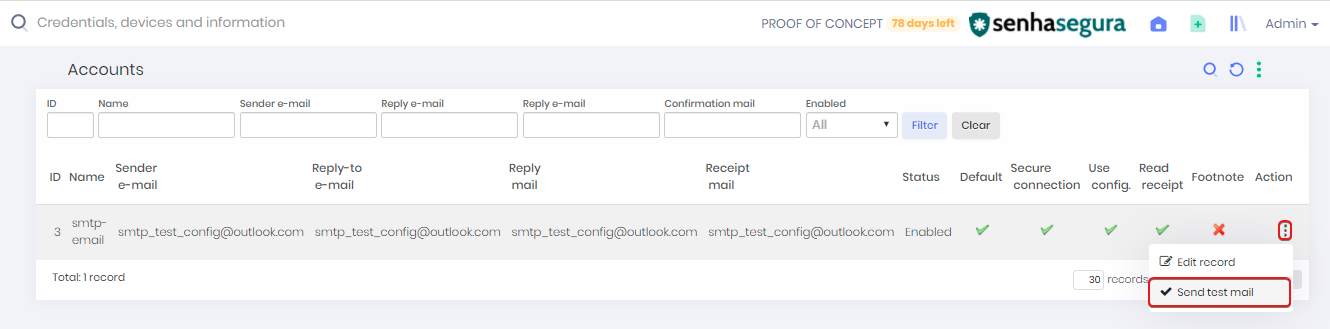
To validate that the configuration is working, do a test submission.
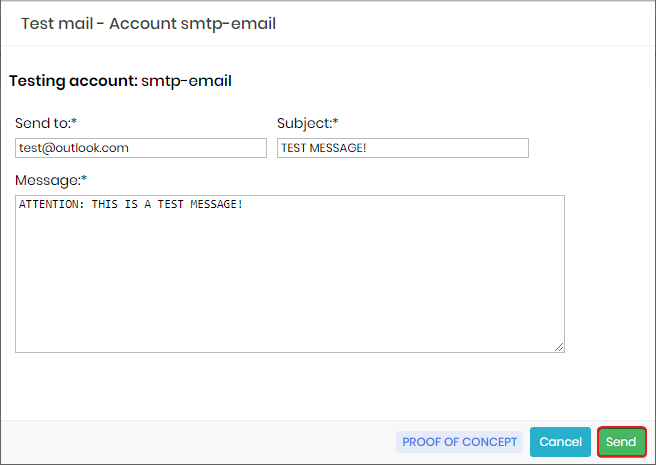

The message was successfully sent.