First, it is necessary install senhasegura.pam collection. To do it, run the command below:
ansible-galaxy collection install senhasegura.pam
After this, we go to create the senhasegura A2A authorization.
In this article, we don’t show you how to create the authorization, but if you don’t know how to do it, see our step-by-step on YouTube:
Get your client_id, client_secret, and credential id. We will use them.
Now, we go to create ansible template. You can see the senhasegura documentation in:
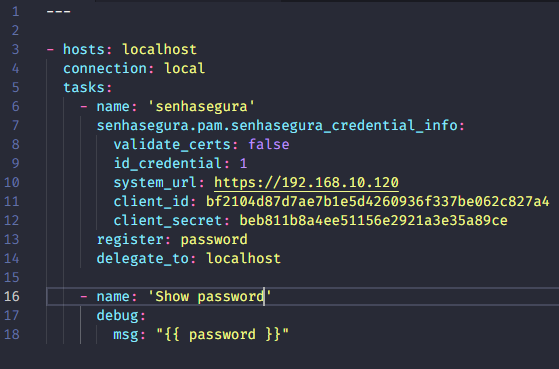
In my case, we have the example below:

You must change the information according to your authorization. Put your client_id, client_secret, and credential id in the gaps. Fill in the senhasegura IP or DNS too.
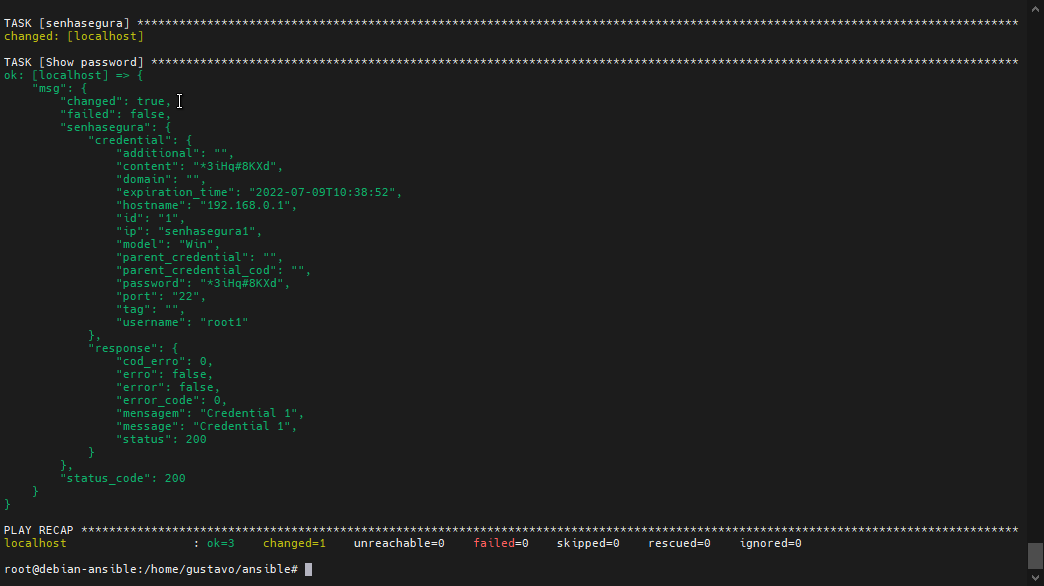
Now, we can execute:
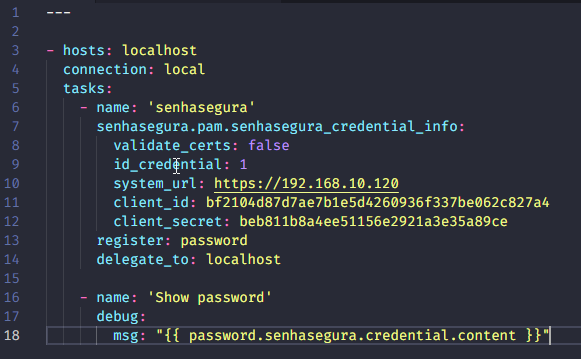
We can view that the password are in “password.senhasegura.credential.content”, so to otimazate the GET, we need to change the ansible to:

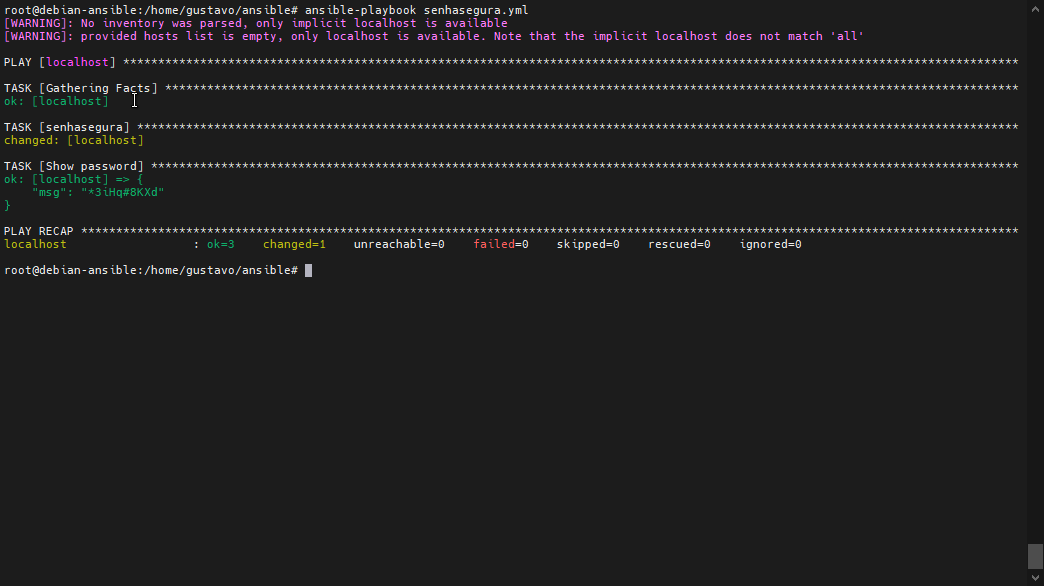
When we execute now, we have only the password:


