SSH keys are essential to ensure secure connections to devices. Using PuTTYgen to create an SSH key and then convert it to OpenSSH format can be divided into simple steps. Below is a step-by-step guide to create, convert and configure the key on the device and in senhasegura.
Step-by-Step Guide to Create and Configure SSH Key:
1. Create SSH Key with PuTTYgen:
-
Start PuTTYgen:
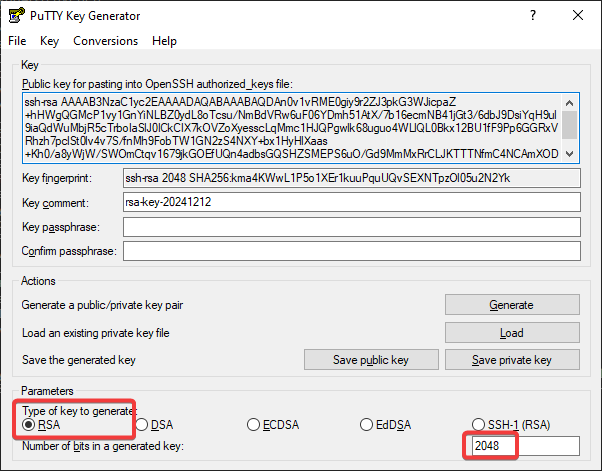
- Open PuTTYgen and select the option to create a brand new key.
-
Choose Key Type and Size:
- Select RSA and set the key size to 2048 bits.
-
Generate Key:
- Click “Generate” and follow the instructions to move your mouse randomly to create the key.
2. Convert to OpenSSH:
-
Export Key to OpenSSH:
-
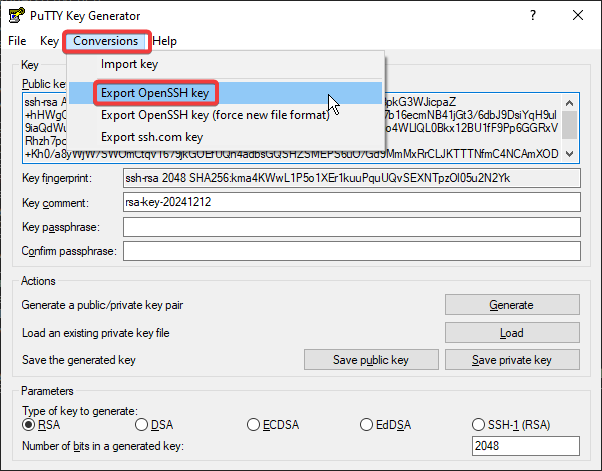
After creating the key, click on “Conversion” and select “Export OpenSSH key”.
-
Save the generated private key in a safe place.
-
-
Get Public Key:
- The public key can be copied directly from the PuTTYgen interface for later use.
3. Configure on SSH Device:
-
Create Key Files on Device:
-
On the target device (SSH), go to the home folder of the user who will use the key.
-
Create the files
id_rsa,id_rsa.pub, andauthorized_keys. -
Insert the private key into
id_rsa, the public key intoid_rsa.pub, and also add the public key toauthorized_keys.
-
-
Change File Permissions:
- Use
chownandchmodcommands to ensure that file permissions are set correctly:
- Use
4. Register SSH Key in senhasegura:
-
Access senhasegura Interface:
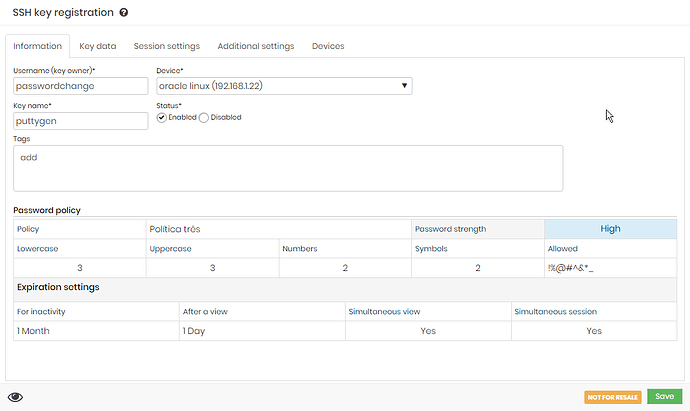
- Navigate to the SSH key management section in senhasegura.
-
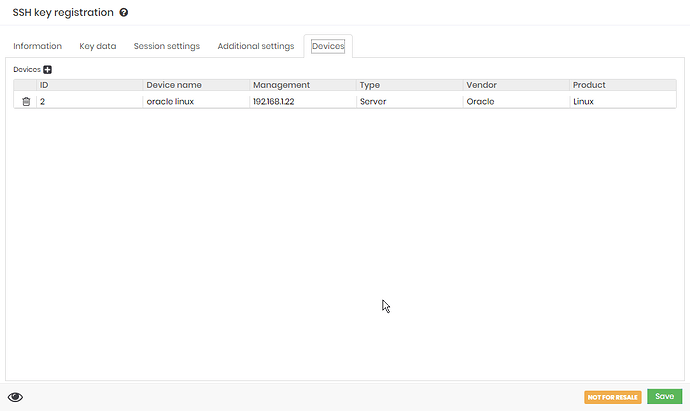
Register New Key:
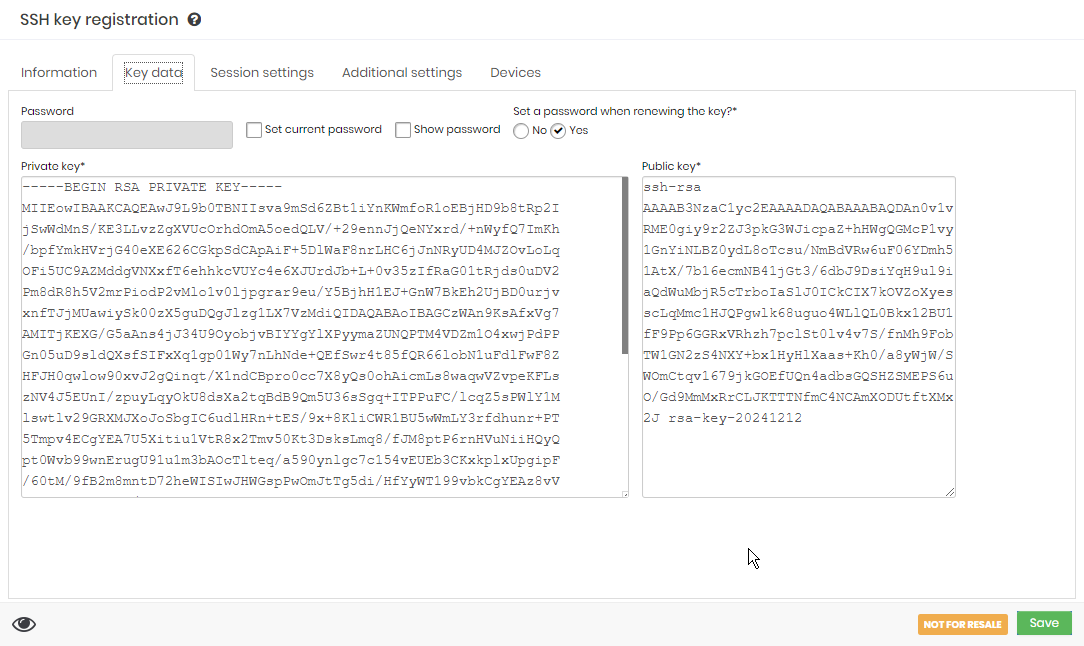
- Enter the information for the SSH key created (public and private) in the system, according to the specific instructions in the senhasegura interface.
Conclusion:
This process allows you to create and convert SSH keys using PuTTYgen and configure them on both the SSH device and senhasegura. This procedure ensures secure connections that are compliant with your organization’s security policies. Make sure to keep private keys safe and apply the correct permissions to protect access.
