1. To create ssh key use the below command, after inserting it will be asked where the ssh key will be saved.
ssh-keygen -t RSA -m PEM
![]() WARNING
WARNING
The logarithm (RSA) and format (PEM) must be exactly like the command above.
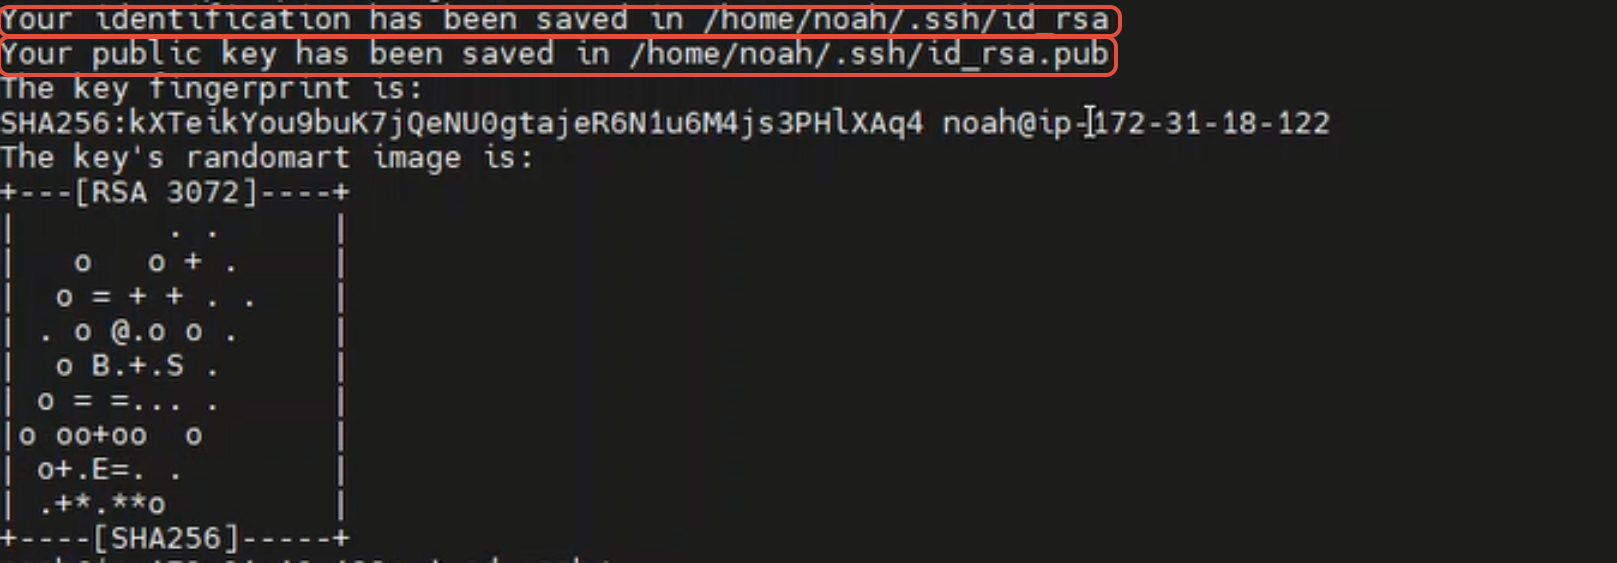
2. Define the location where the key will be saved, in this case the local default.
![]()
3. You will be asked to add a passphrase to the key, leave empty, as every time this key is used this information will be required.
4. A message confirming the creation of the key will be displayed, a public<** id_rsa >and other private < id_rsa.pub**>.
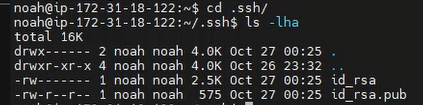
5. To validate the contents of the keys, access her directory, in this case .ssh
cd .ssh/
**6.**In the directory we will see which files were created, in this case <id_rsa> which is a private key, and <id_rsa.pub> which contains the contents of the public key
ls -lha
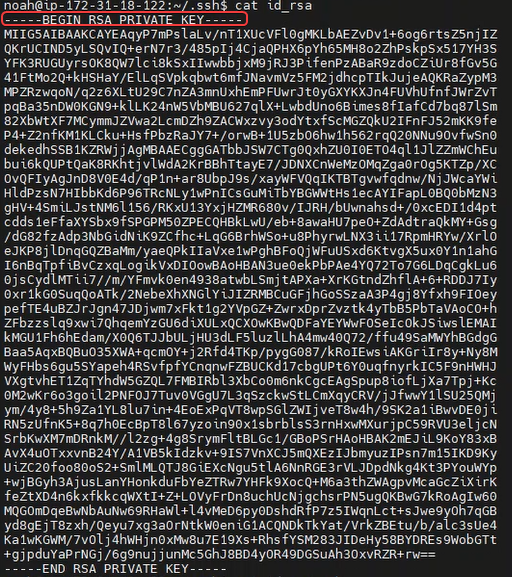
7. Validate the contents of the private key, it must be of type RSA
cat <name_key>
8. Validate the contents of the públic key
cat <name_key.pub>
9. The authorized key file must receive the contents of the public key. In this example, this file will now be created.
cp <name_key.pub> authorized_key
10. Validate if the key is inside authorized_key.
cat authorized_key
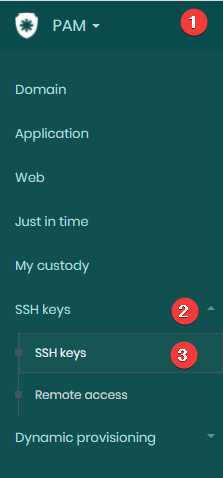
Key registration in senhasegura
1. Acess PAM>SSH Keys> SSH Keys, in the screen click in New
2. In the new screen fill with required information
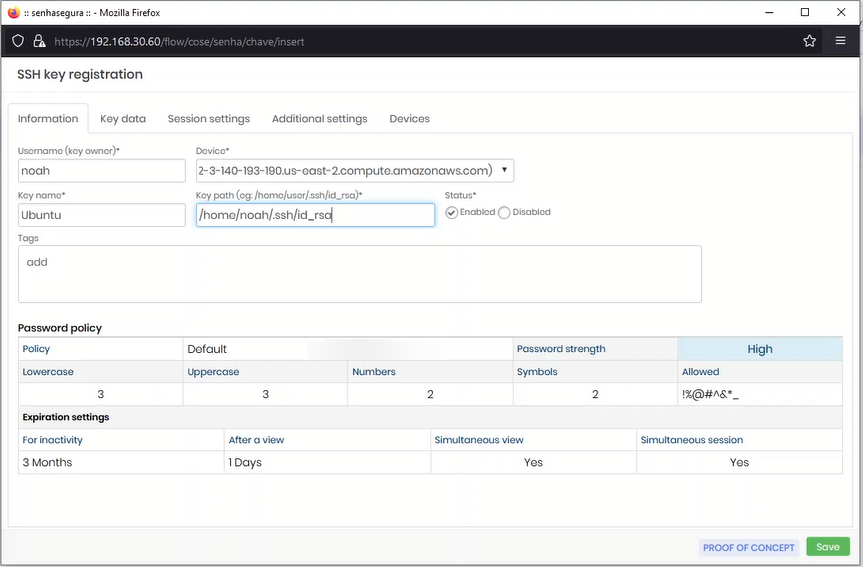
3. On the tab Information define the following information:
-
Username(key owner): enter the name of the key owner
-
Device: select the device
-
Key name: insert a name to key
-
Key path: enter the key path on your device
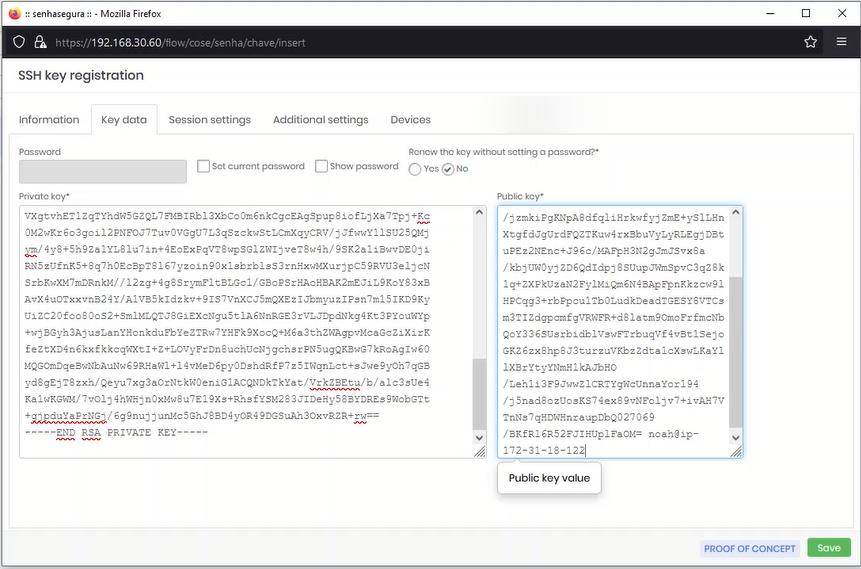
4. On the tab Key data define the following information:
- Password: If defined passphrase insert now.
- Private Key: insert private key content
- Public key: insert public key content
5. On the tab Devices click in icon “+” to define the devices that will have access to the key. Select the device and click ‘Add’
