To add the disk, proceed as follows:
- Shut down the instance;
- Take a snapshot;
- Add the new disk;
- Restart the instance.
Considerations:
- This procedure is for scenarios where a disk has been added to the HD and cannot be removed;
- The expansion limit allowed on the HD is 2TB, if there is an expansion greater than this value, it will not be possible to use this space;
- The senhasegura is not responsible for errors caused by expansions greater than 2 TB.
Attention: The steps must be followed in order.
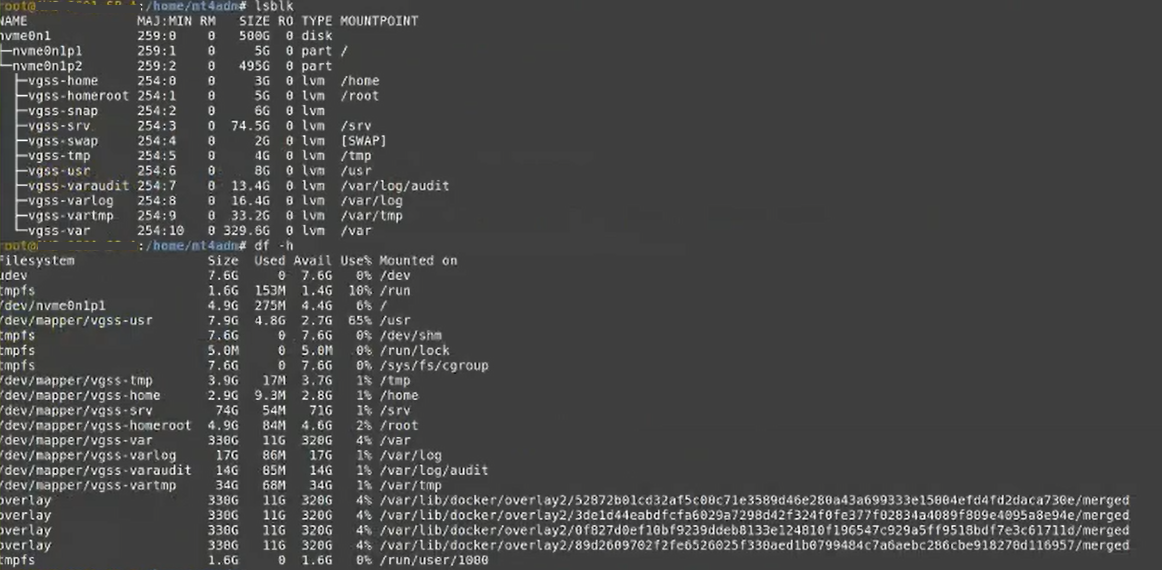
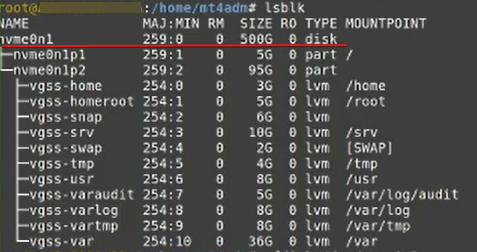
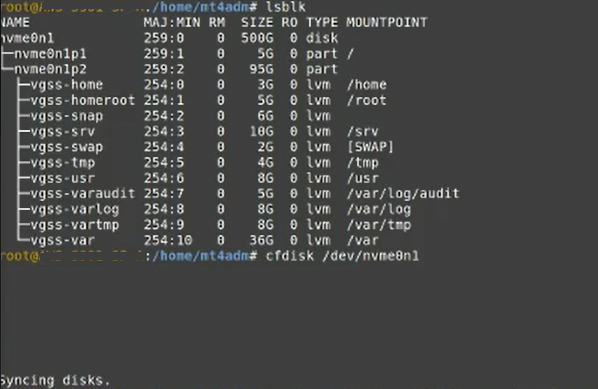
1. After adding the disk in your virtualizer list all HD partitions with the command below:
lsblk
The added 500GB partition will be displayed.
2. Manipulate the partition /dev/nvme0n1p2 with the following command.
cfdisk /dev/nvme0n1
This step is highly critical and any error can cause the loss of senhasegura completely.
2.2 Delete the partition /dev/nvme0n1p2

3. In ‘New’ create a new partition.

4. Set its size based on the total amount available for expansion.
Attention: The available value is highlighted in the ‘Size’ field in ‘Free Space’.

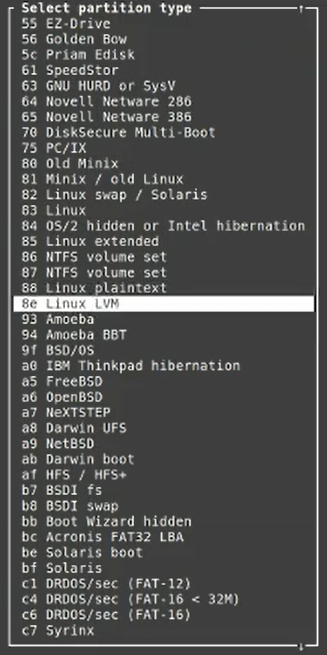
5. Set the partition type to “Primary”.

6. Change the partition type to ‘8e Linux LVM’.

7. Select the ‘Write’ option to apply all actions performed.
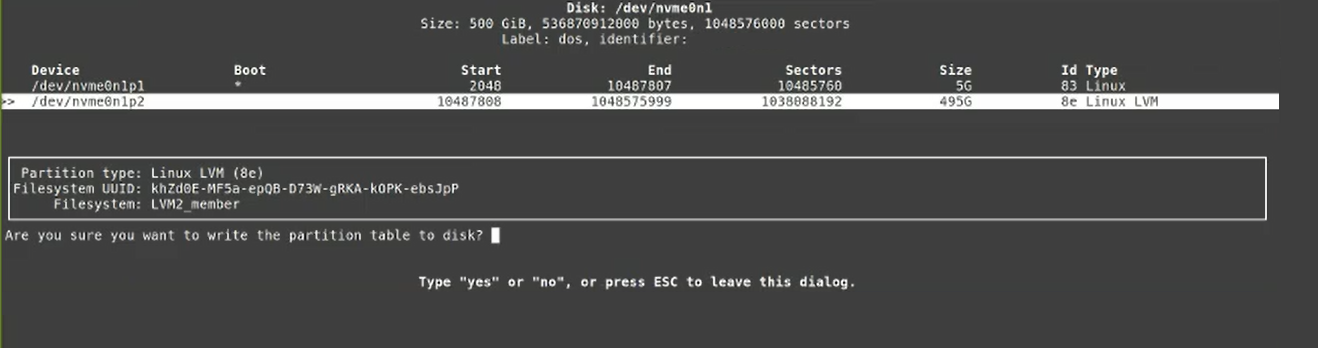
8. A message informing about syncing disks will be displayed.
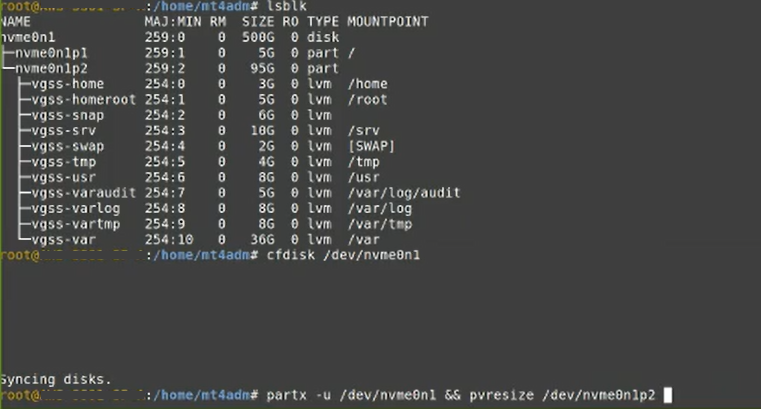
9. After performing the previous settings, use the following command set to read the HD:
partx -u /dev/nvme0n1 && pvresize /dev/nvme0n1p2
10. Expand with the command below:
orbit disk --expand
11. Confirm the action.

12. To validate if the procedure was successful, list all the partitions present on the HD with the command below:
lsblk
df-h