Prerequisites:
- Administrative access to senhasegura to create an access provider;
- Network communication from senhasegura to Azure;
- Network communication from Azure to senhasegura for Token requests and user provisioning through the SCIM API;
- An Enterprise Application configured in Azure;
- Azure Groups must have exactly the same name as User Groups in senhasegura. Do not include spaces in the name;
- Azure Roles must have exactly the same name as roles in senhasegura. Do not include spaces in the name;
- senhasegura must have a DSN with a valid published certificate;
- Update the system URL.
Reference documentation:
1. Create an Identity Management (IGA) provider
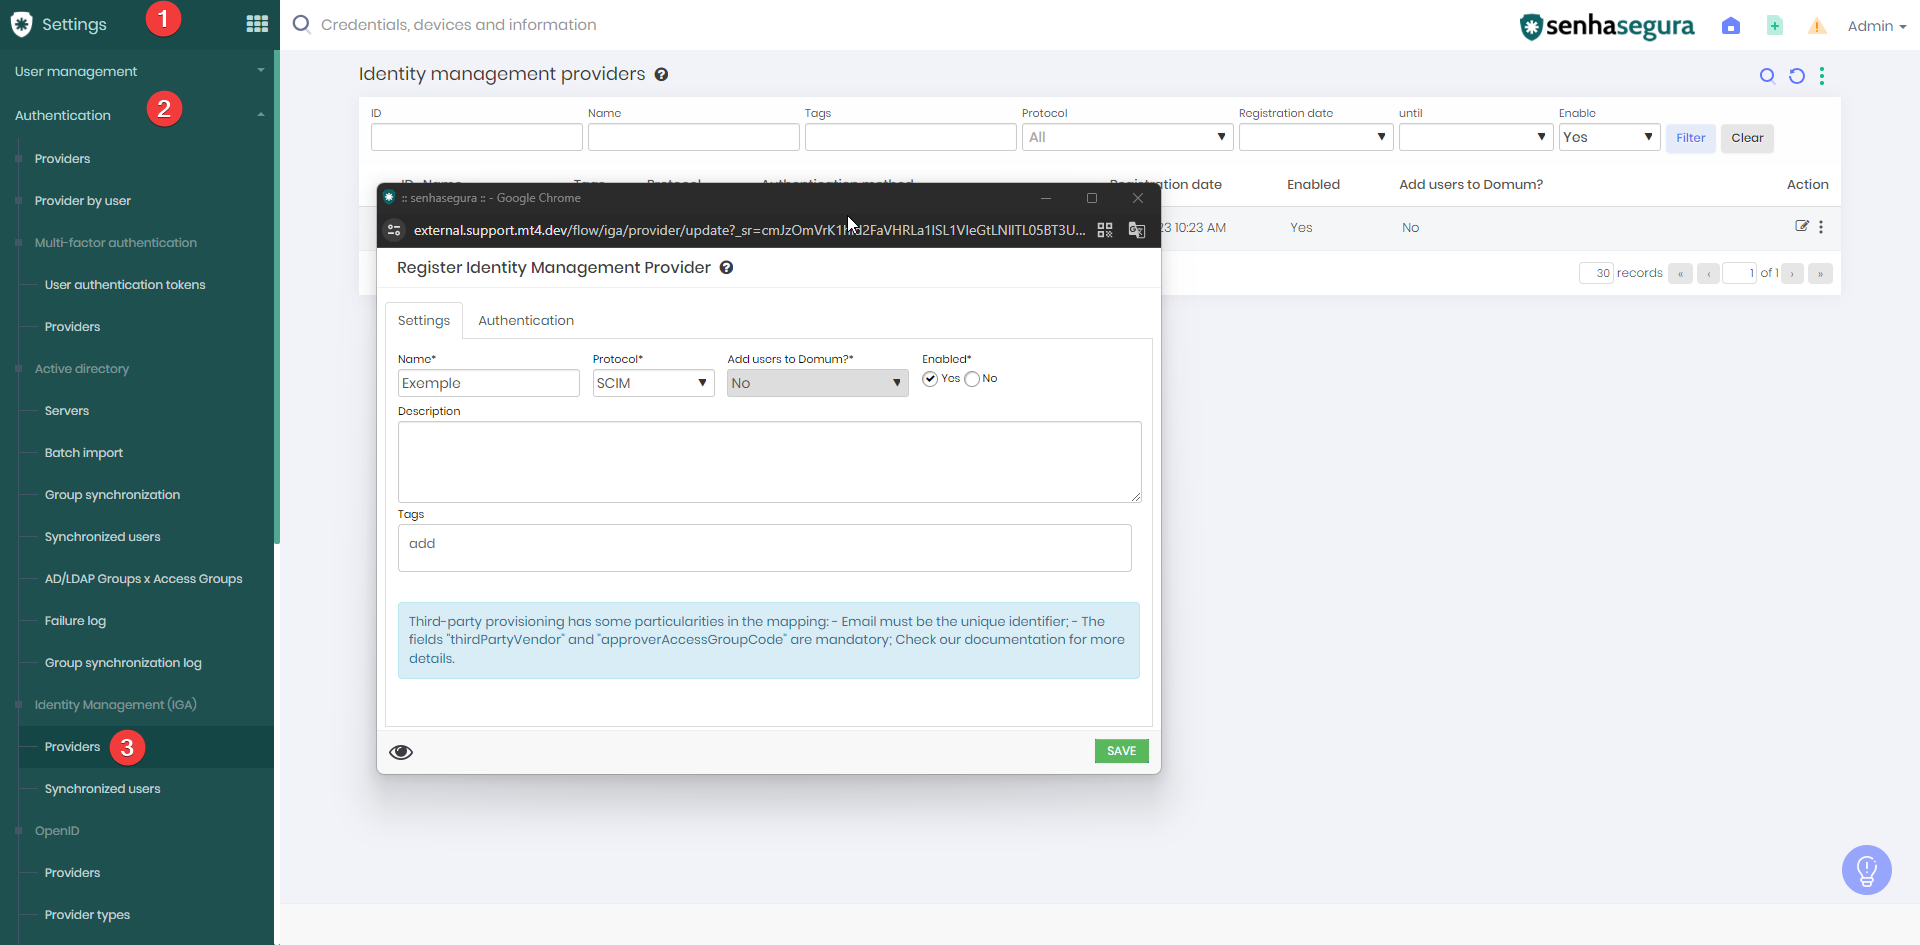
In the Authentication tab, enter the permitted source IP addresses. In this demonstration, all addresses will be allowed. Validate this configuration according to your production environment requirements.

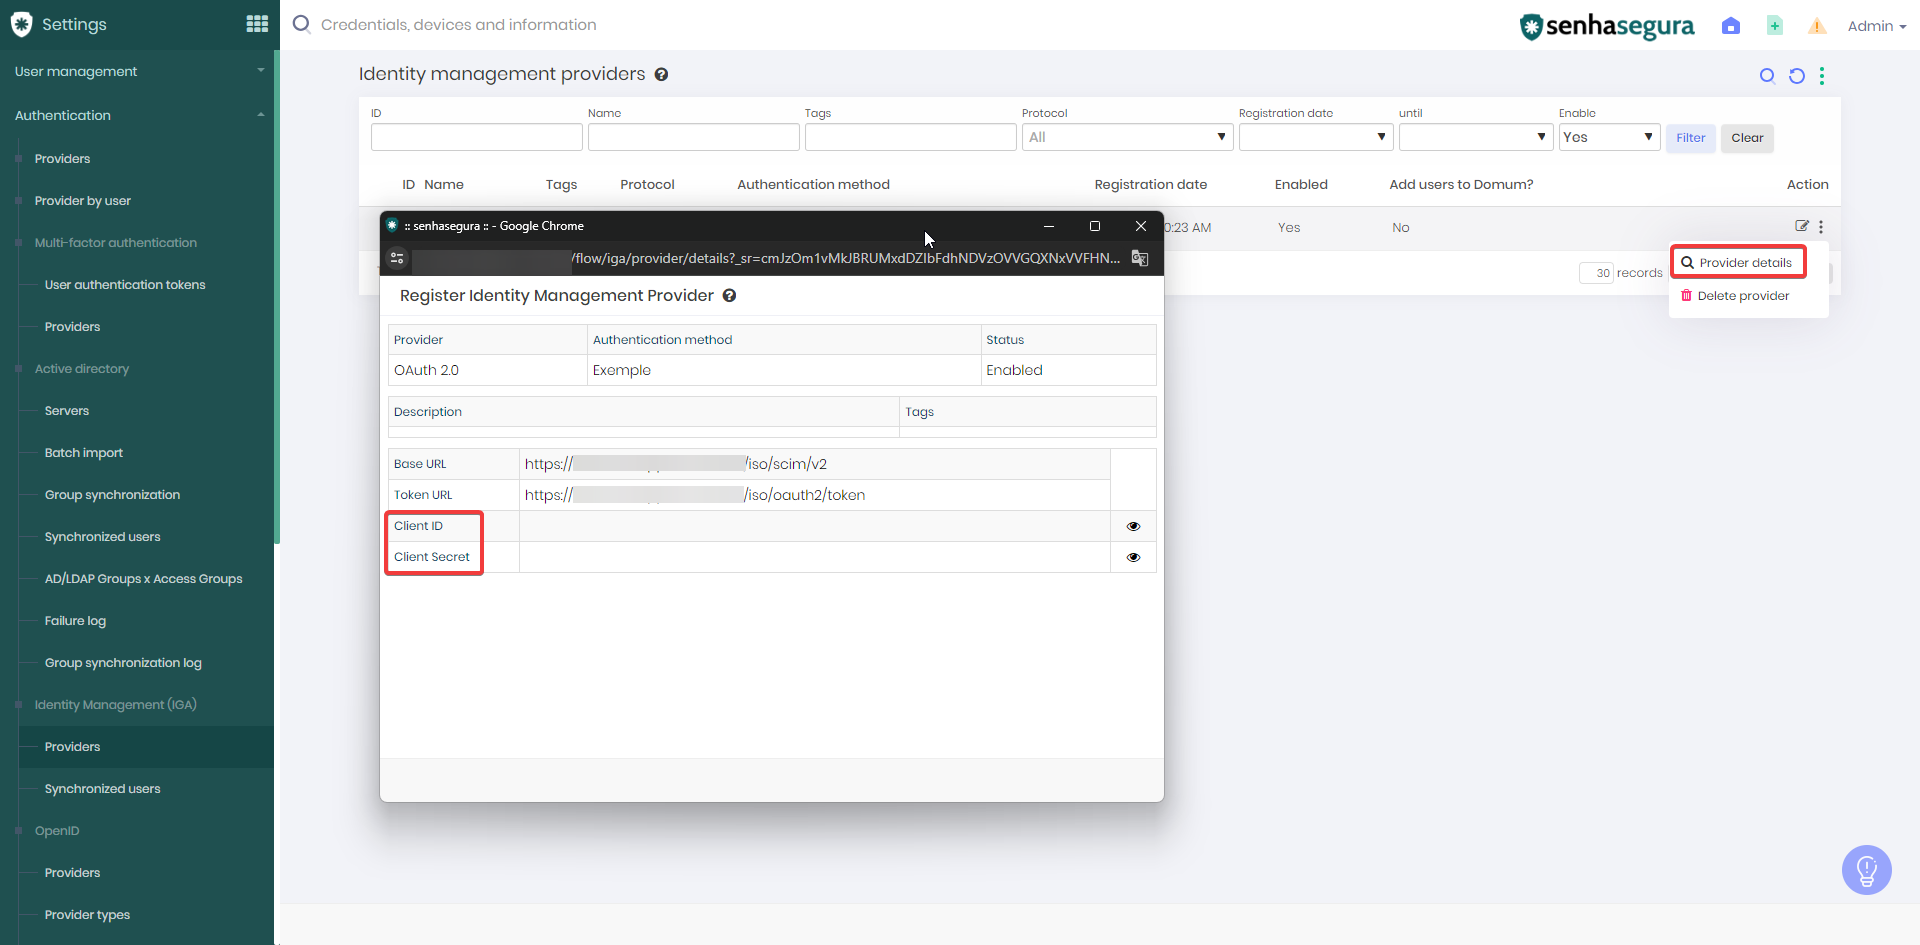
After creating the provider, collect the Client ID and Client Secret information, as they will be required in subsequent steps.
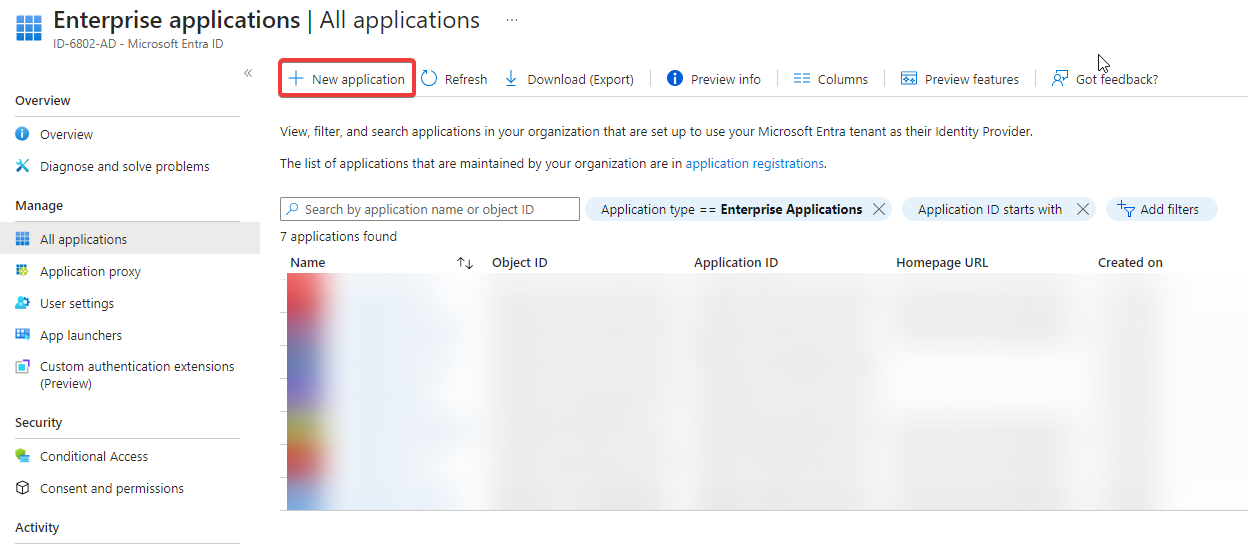
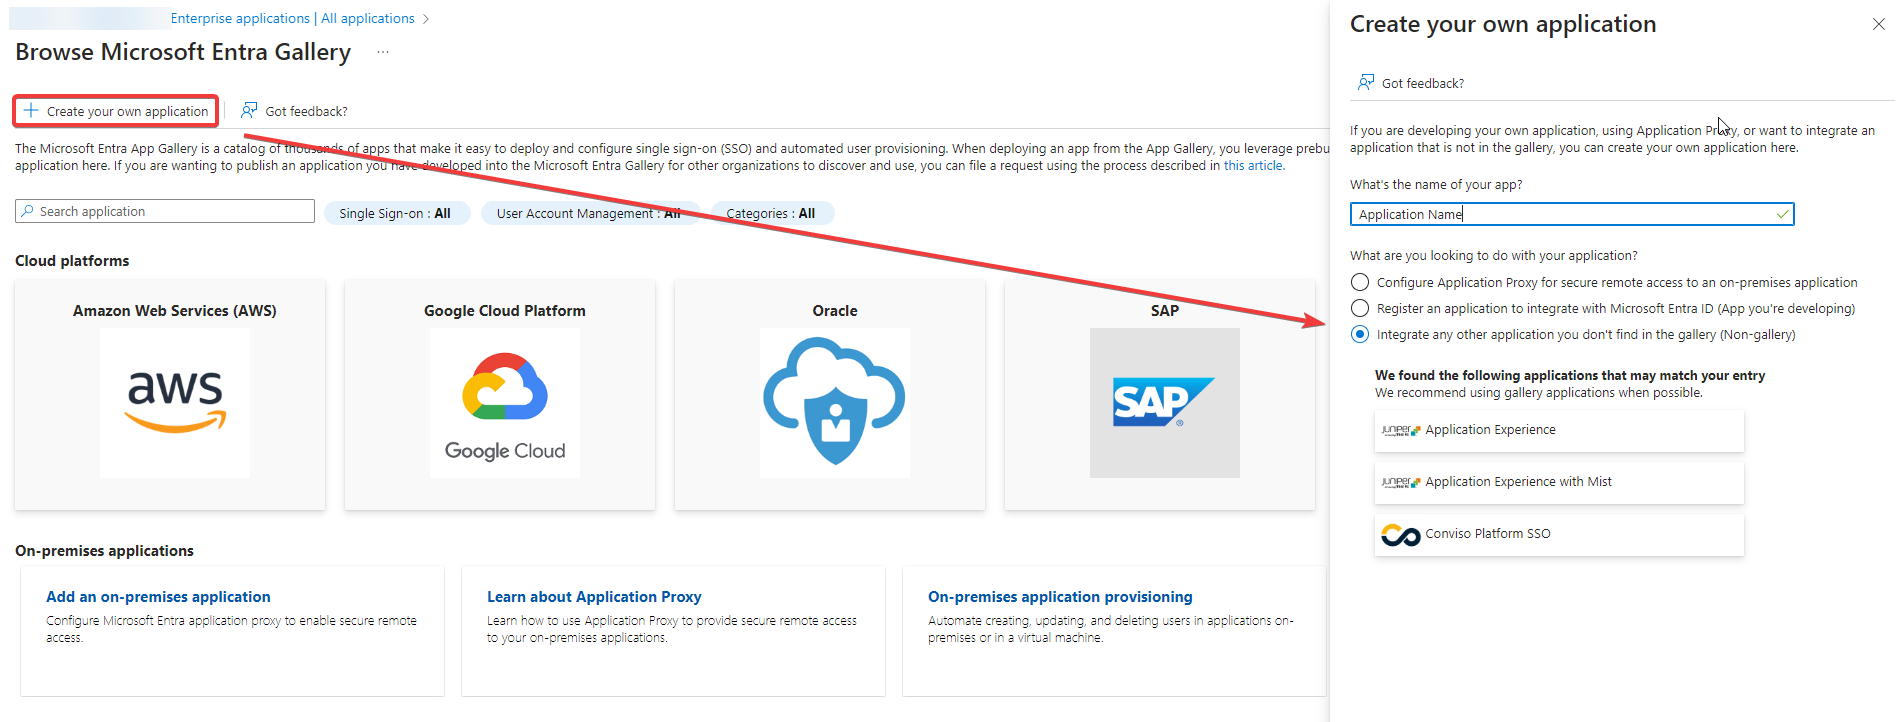
2. Create an Enterprise Application
Access Microsoft Entra ID and create the Enterprise Application.
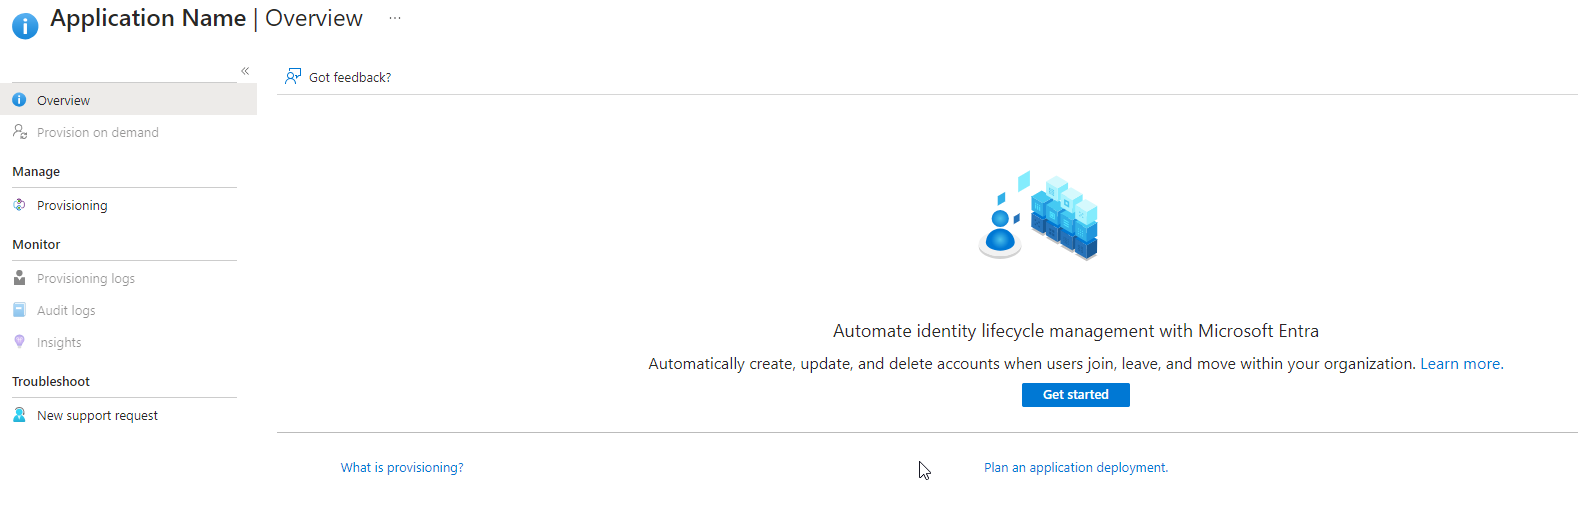
3. Initiate the provisioning configuration
Access the Provisioning tab of the Enterprise Application and click on Introduction to create the provisioning configuration.
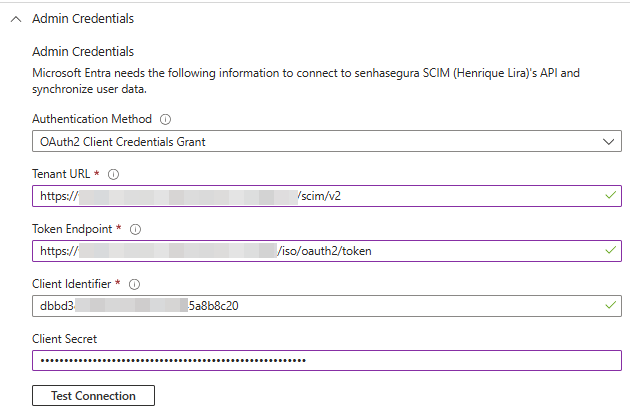
Select the provisioning mode and expand the Admin Credentials section.
The Authentication Method must be set to OAuth 2.0 client credentials grant.
Configure the remaining authentication parameters according to the values provided by the Segura® provider:
| Segura® | Azure |
|---|---|
| Base URL | Tenant URL |
| Token URL | Token Endpoint |
| Client ID | Client Identifier |
| Client Secret | Client Secret |
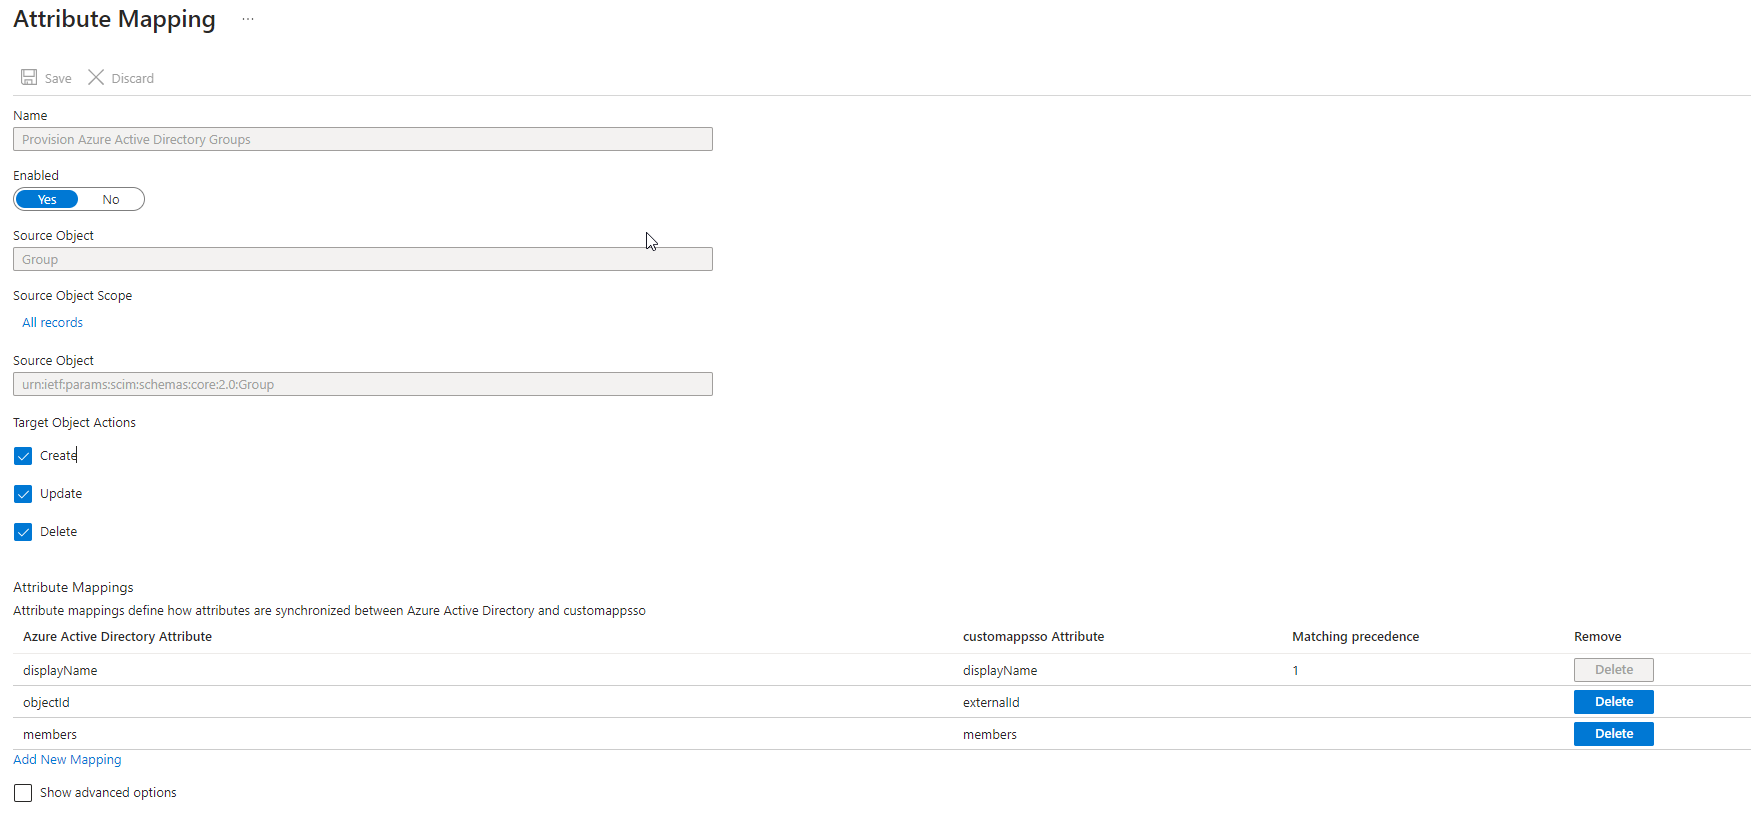
4. Configure Group mappings
After completing step 3, expand the Mappings option and select Provision Azure Active Directory Groups.
Configure as illustrated below and save the changes:
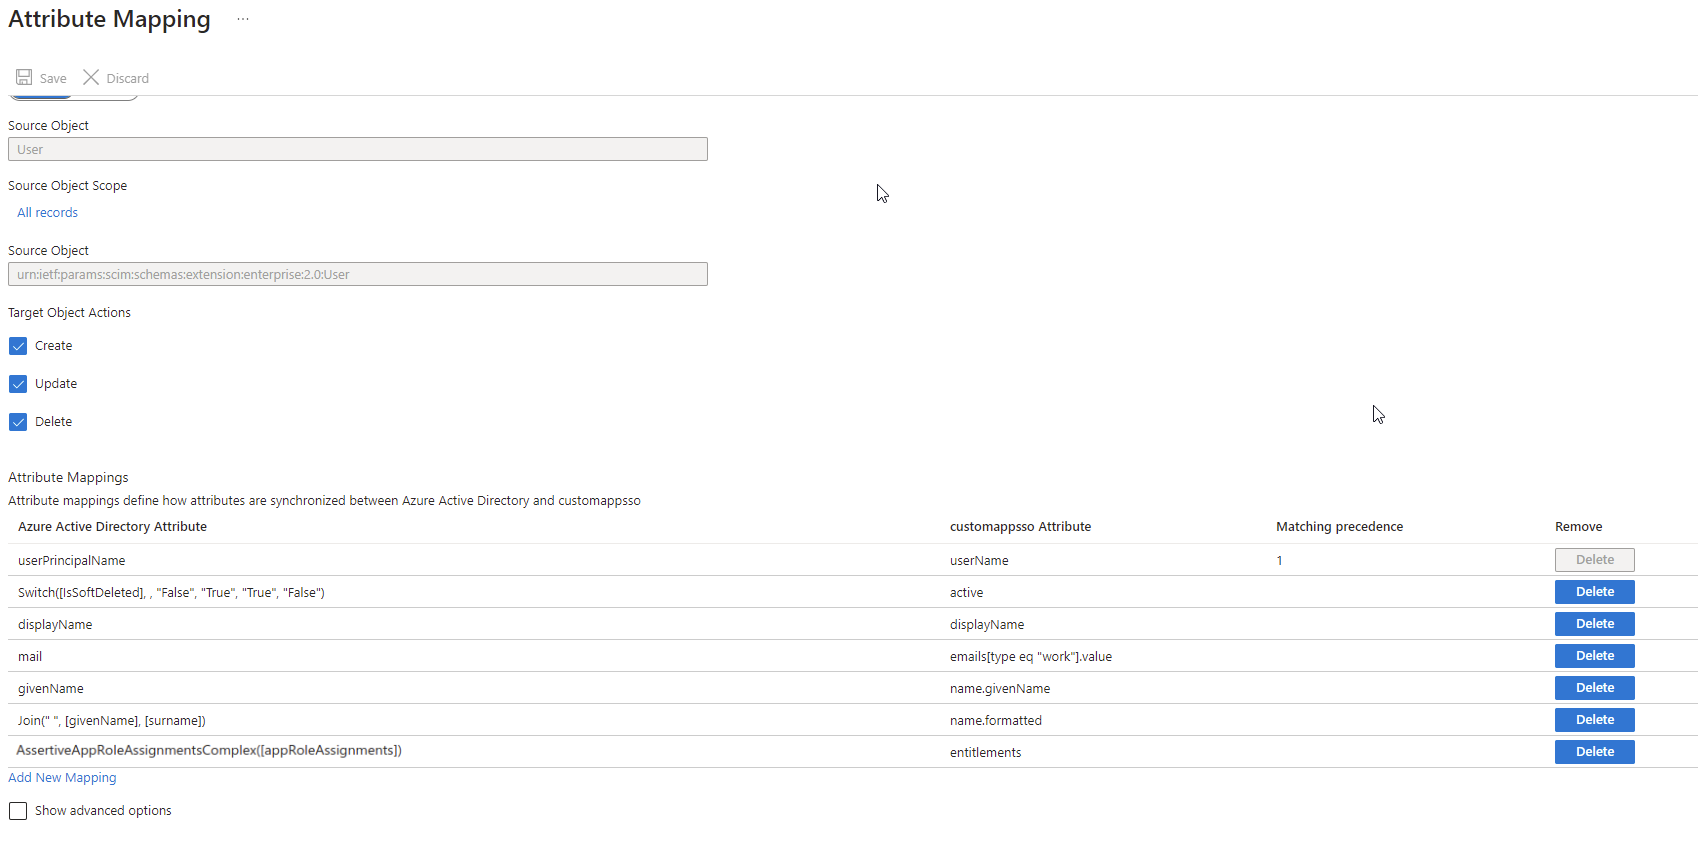
5. Configure User mappings
After completing step 4, select Provision Azure Active Directory Users.
Only the attributes listed below are required:
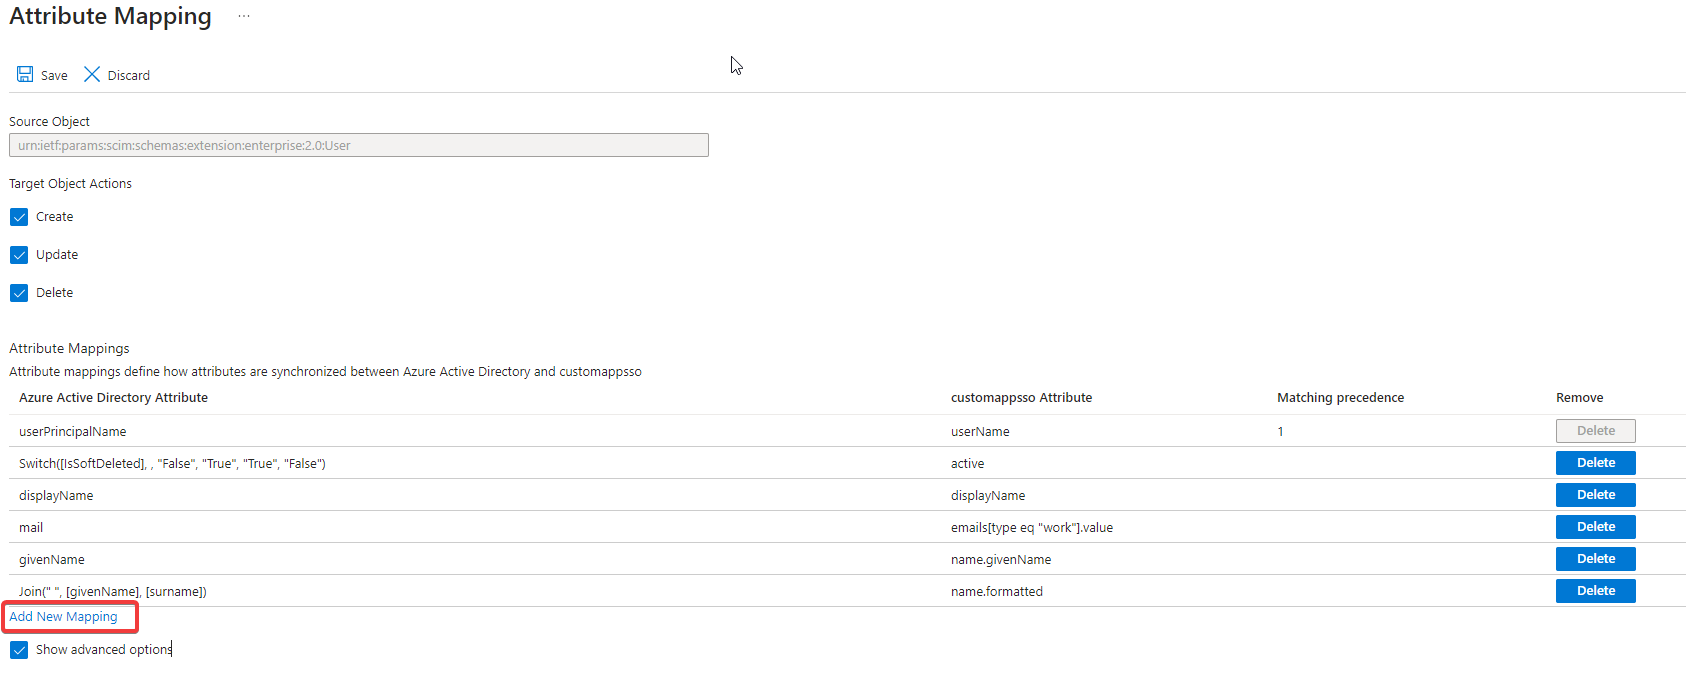
If the attribute AssertiveAppRoleAssignmentsComplex([appRoleAssignments]) is not available, it must be created.
To do so, select Show advanced options and then Edit attribute list for customappsso.

Add a new attribute as illustrated below and save the configuration.

Afterward, return to the Mapping screen and select Add New Mapping.
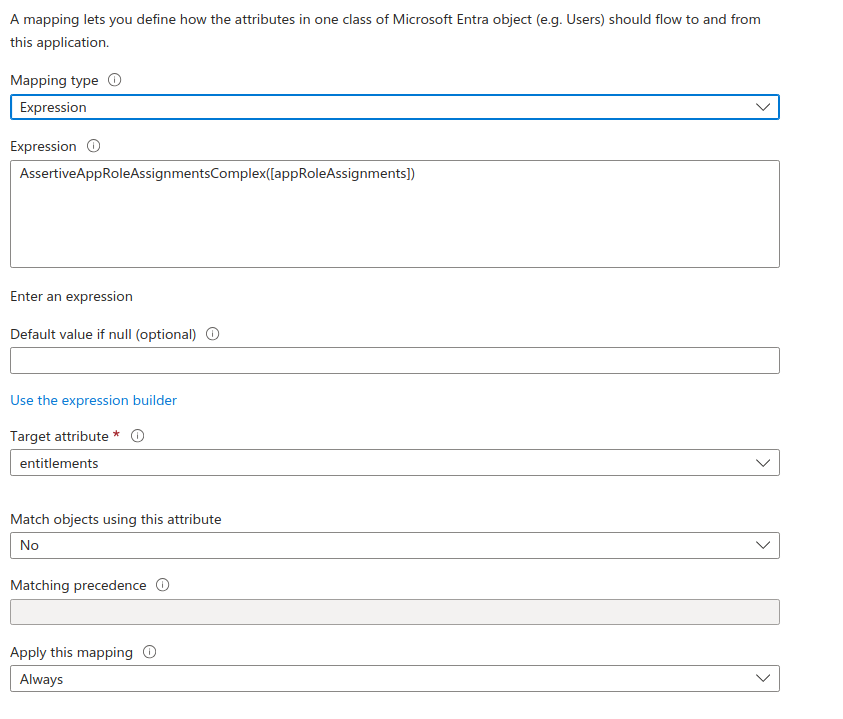
Change the Mapping type to Expression and, in the corresponding field, enter:
AssertiveAppRoleAssignmentsComplex([appRoleAssignments])
In Target attribute, select entitlements and save the configuration.
Save the provisioning Mappings and return to the main provisioning configuration screen.
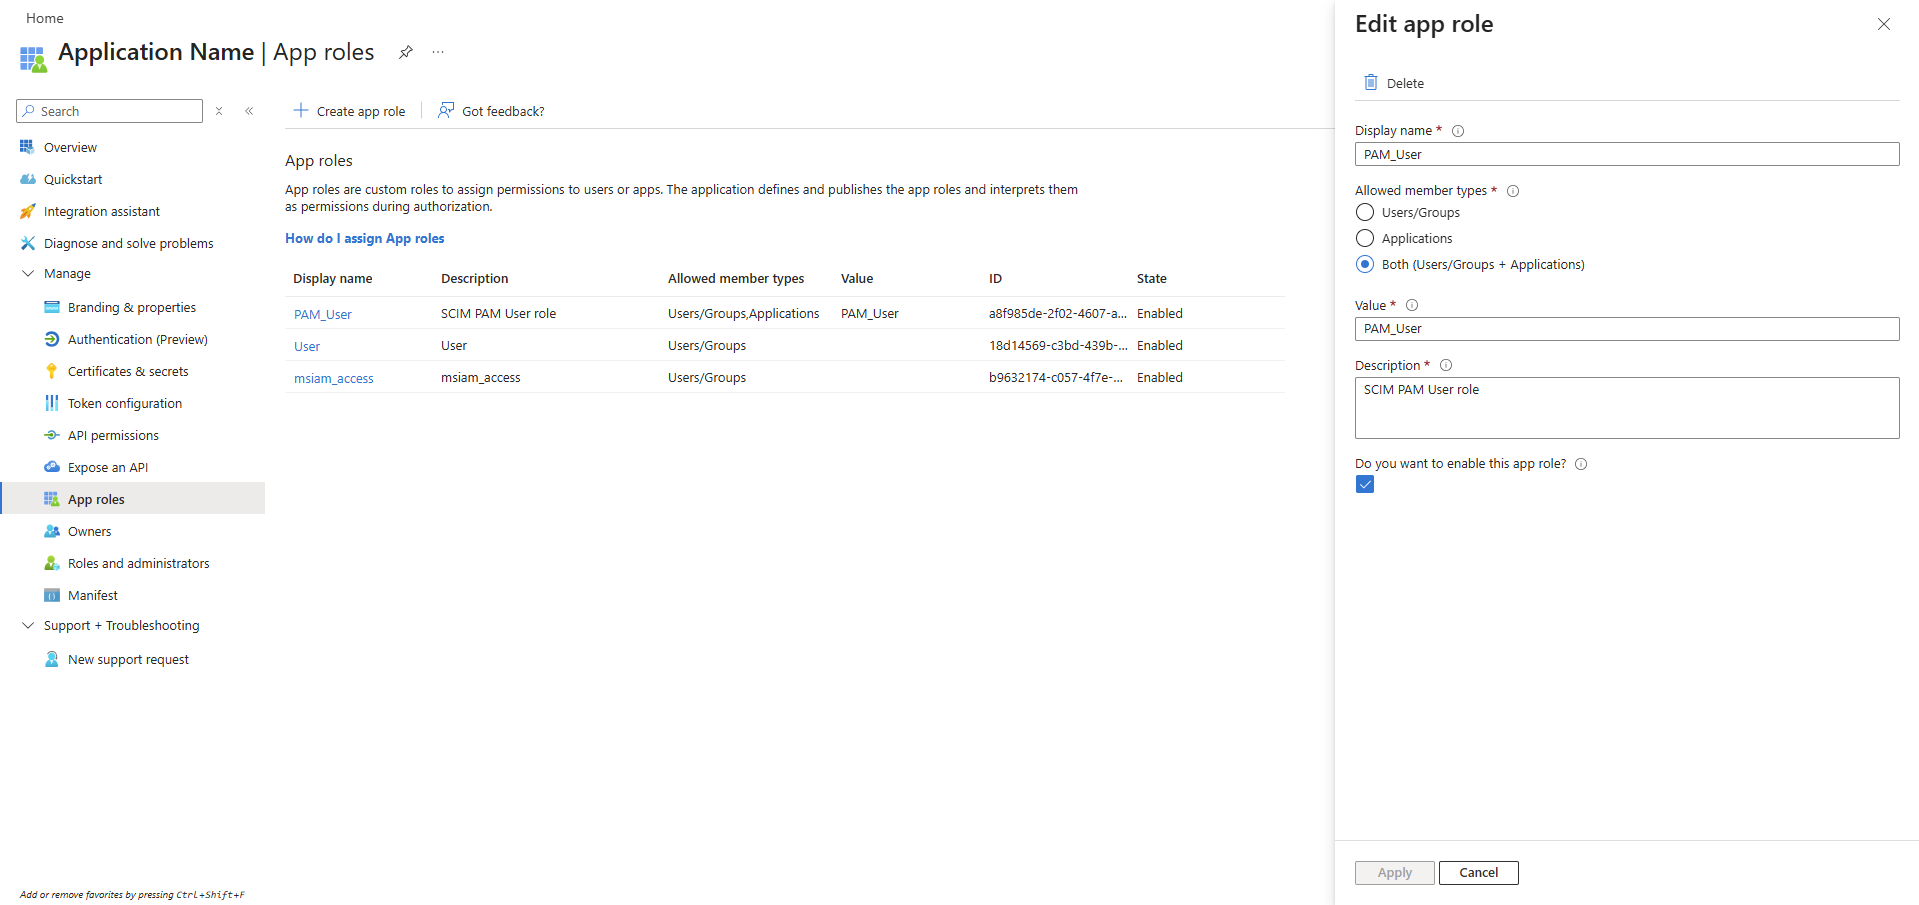
6. Create the App roles
After completing step 5, proceed with the creation of the App roles.
In Segura®, permissions for actions, menu visibility, and related configurations are defined through Roles. To manage these via SCIM, it is necessary to create App roles and associate them with Azure Groups.
![]() App roles must not contain spaces or accented characters in their names. If compound names are required, use the underscore “_” or hyphen “-” characters instead of spaces.
App roles must not contain spaces or accented characters in their names. If compound names are required, use the underscore “_” or hyphen “-” characters instead of spaces.
To create them, access Microsoft Entra ID → App registrations and locate the application previously configured. Then navigate to Manage → App roles and create the role that will be assigned to provisioned users, as illustrated below.
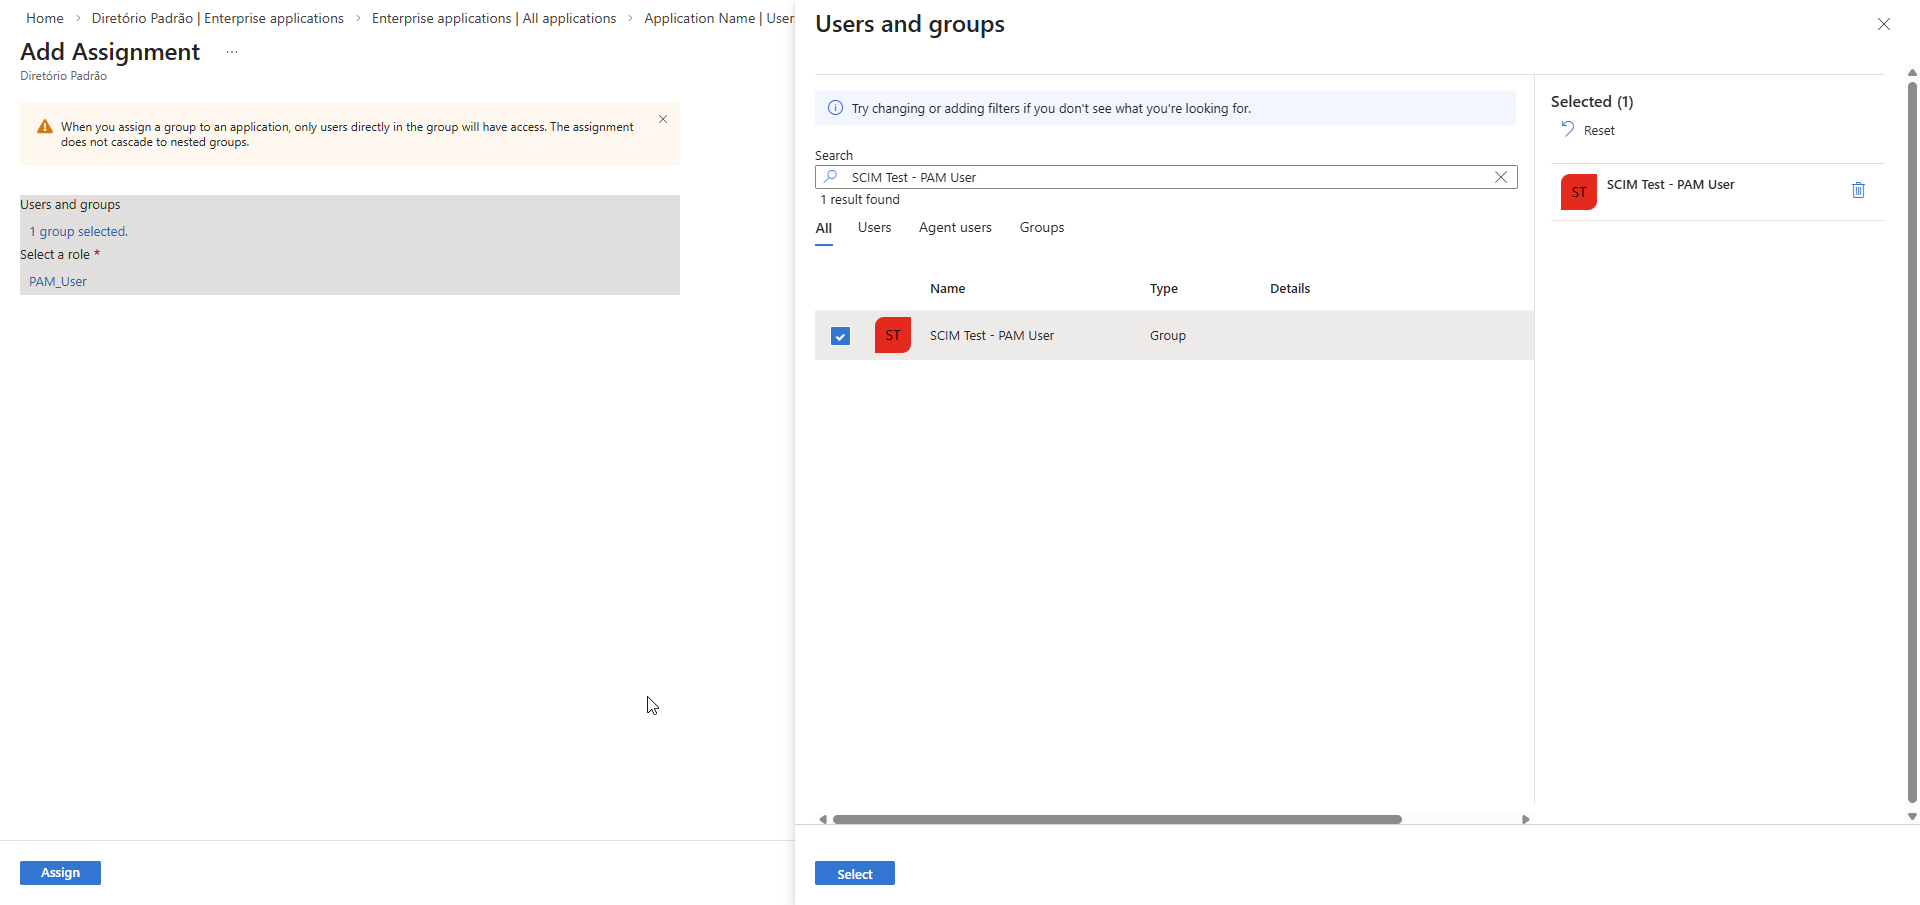
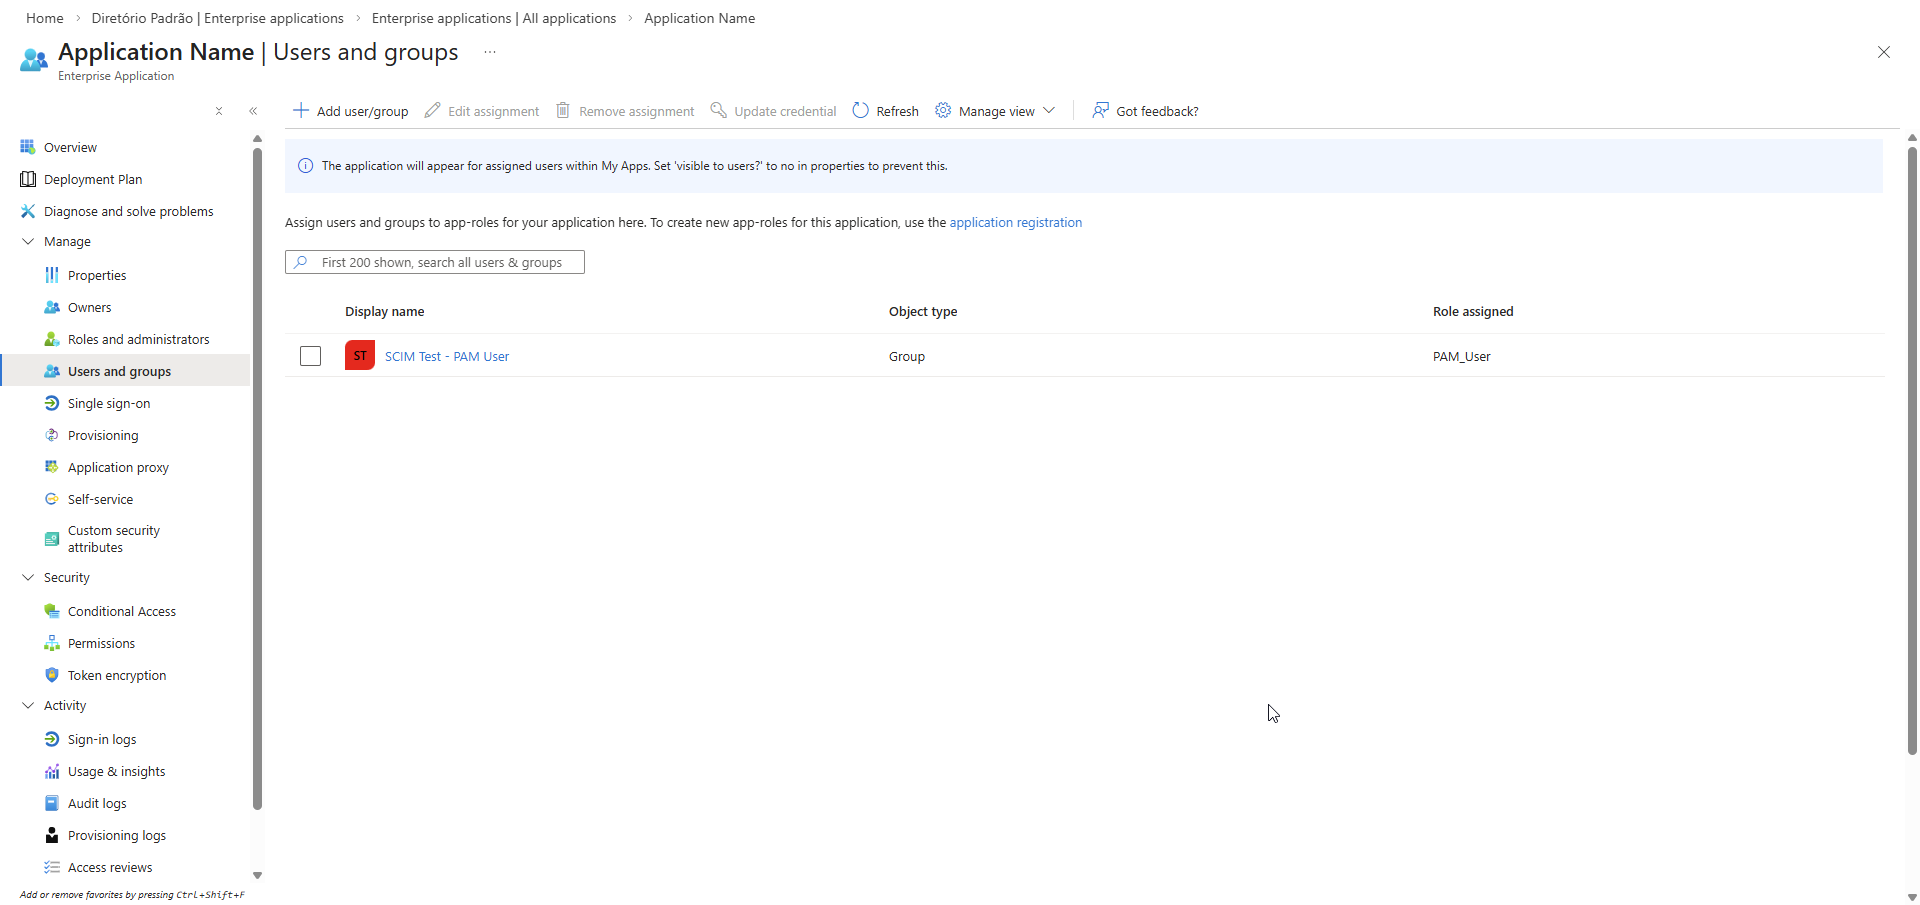
7. Associate App roles with Groups
After completing step 6, associate the App roles with the corresponding Azure Groups.
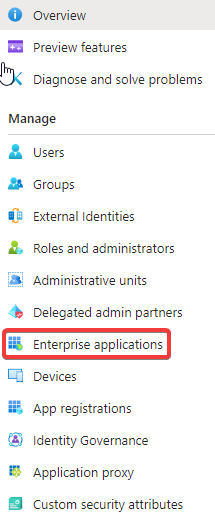
To do so, access Microsoft Entra ID → Enterprise applications and locate your application. Select Users and groups → Add user/group and associate the desired Group(s) with the created App role(s).
8. Enable provisioning
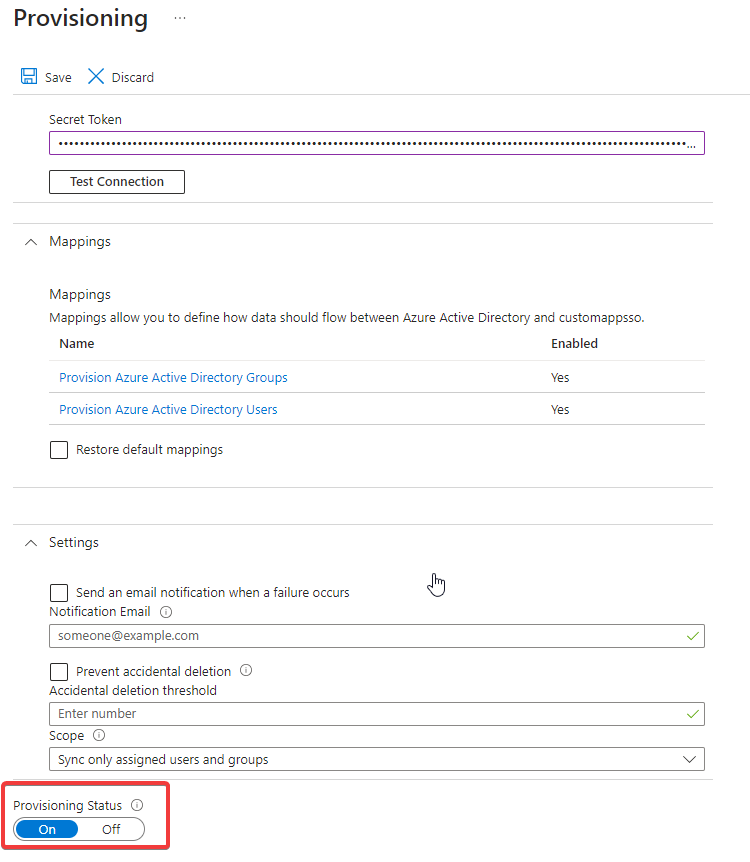
Once enabled, provisioning will run automatically and synchronize Azure AD users with Segura® every 40 minutes.
![]() Additional information
Additional information
- Add groups to organize users and devices for Microsoft Intune - Microsoft Intune | Microsoft Learn
- Create a custom role in Microsoft Entra ID - Microsoft Entra ID | Microsoft Learn
SAML
To enable authentication of Segura® users with Azure, it is necessary to configure the Single sign-on SAML integration, according to the supporting documentation below: